
Menu
As part of Watermark’s continued effort to keep server infrastructure up to date and secure, the Watermark license server has been upgraded on the 17/06/2026.
This article discusses changes that may now be required on your local network in order to keep Volume functioning.
The license server checks and authenticates Volume connections to confirm an active license for the organization is available.
As part of the server upgrade, the IP address of the license server has been changed from 178.159.10.172 to 178.159.10.174.
If you block or filter outbound port 80 on your firewall, the firewall rules will need updating to allow outbound access to 178.159.10.174 on port 80. Typically, outbound port 80 is not usually blocked on the majority of networks, however depending on your network security it could be.
If a connection to the license server is not established within 30 days, then a message may appear when logging into Volume reporting your license has expired. If port 80 is being blocked or filtered on your outbound firewall, it is important that the rules are updated with the new license server IP before 17/07/2026. This will then prevent Volume reporting the license expiry message.
If you have any concerns or queries regarding this server upgrade, please contact support@watermarktech.co.uk and we will be happy to assist further.
Thank you,
Your Watermark Support Team
Watermark can assist in extracting data upon request. These are the steps to accessing the data.
FileZilla is the software we use to host our files and allow users to access them. Download the client using the link below:
https://filezilla-project.org/download.php?type=client
When you open the FileZilla client, you will see something similar to this:
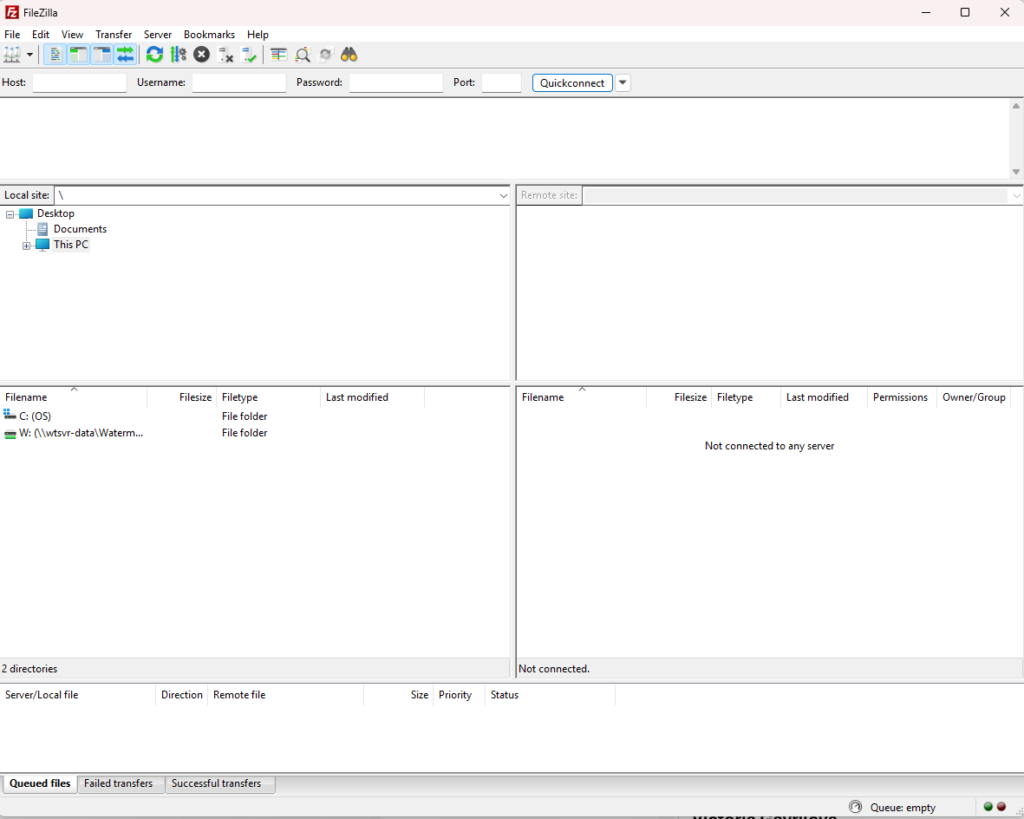
To access the files, the Watermark support team will send you details to put into the client. The details we will provide via email are the host, username and port. The password will be provided via phone call to ensure security.
Once all the details are recieved, fill them in at the top and click 'Quickconnect'.

To download files after accessing them, either right click the file and click 'Download' or alternatively, drag the file into your desired location on the left.
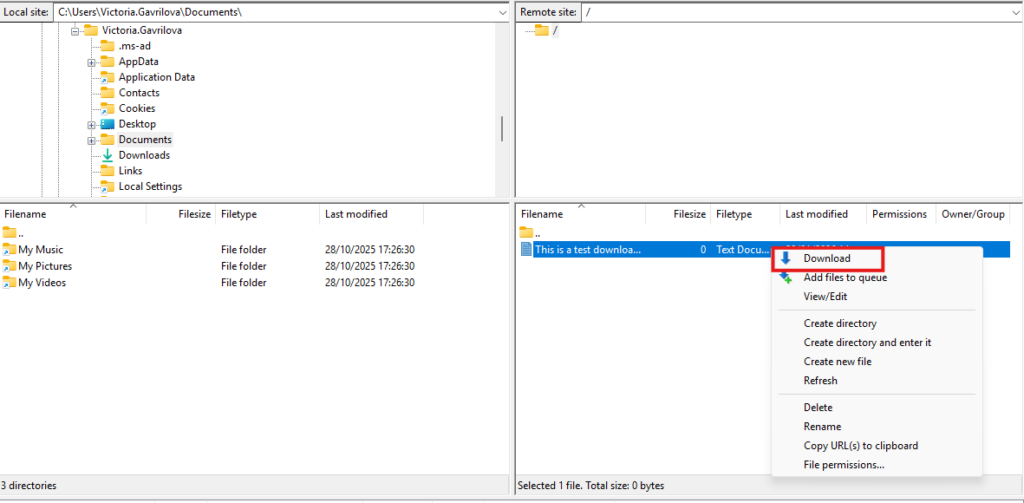
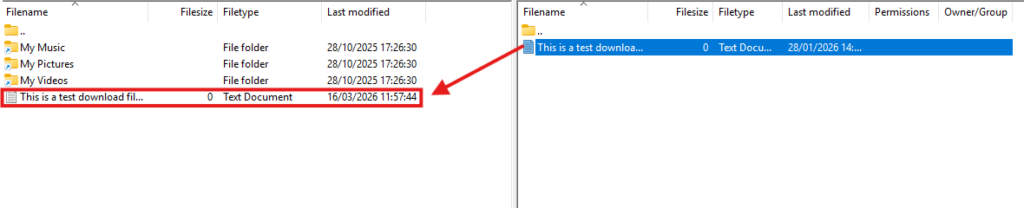
Once you have successfully downloaded the files and are able to access them, email support@watermarktech.co.uk confirming this. This is to ensure that we do not hold onto sensitive customer data for longer than necessary.
This article describes how to remove Firebird when using Volume due to the vulnerabilities with Firebird 2.5.
The latest version of Firebird which is compatible with Volume is 2.5, which is now out of date. If this is causing a security risk, follow the steps below to reduce this.
Note that Firebird can only be deleted from the client machines, not the server itself.
Follow the steps below to uninstall Volume and Firebird before continuing.
1. Open the Add or Remove Programs page in settings by typing this into the search bar and pressing Enter.
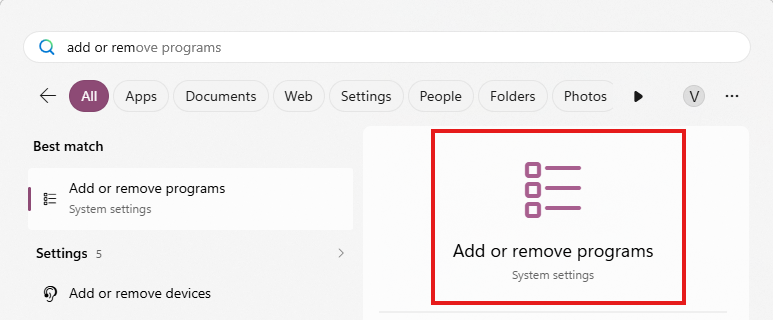
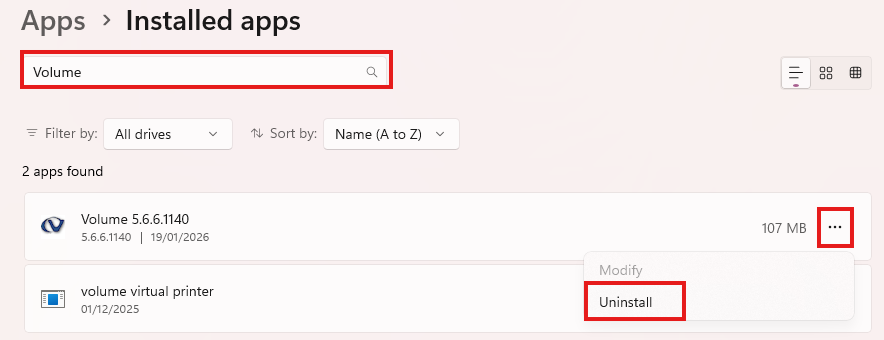
2. Search for Volume in the search bar. Click the three dots to the side of it and then click Uninstall.
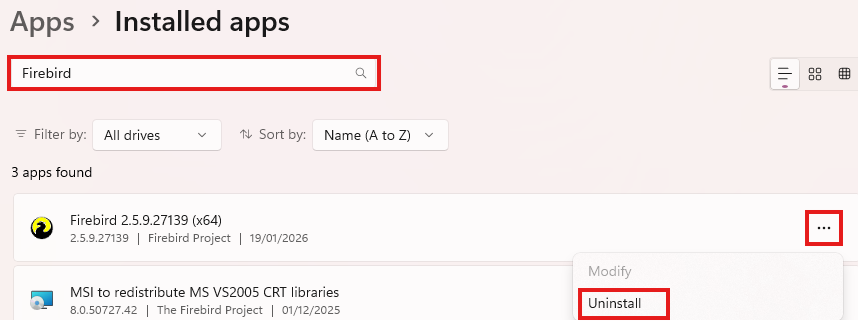
3. Search for Firebird in the search bar. Click the three dots to the side of it and then click Uninstall.
Now you are ready to follow the steps below.
Follow the steps below to install Volume alongside a flag to prevent the additional installation of Firebird.
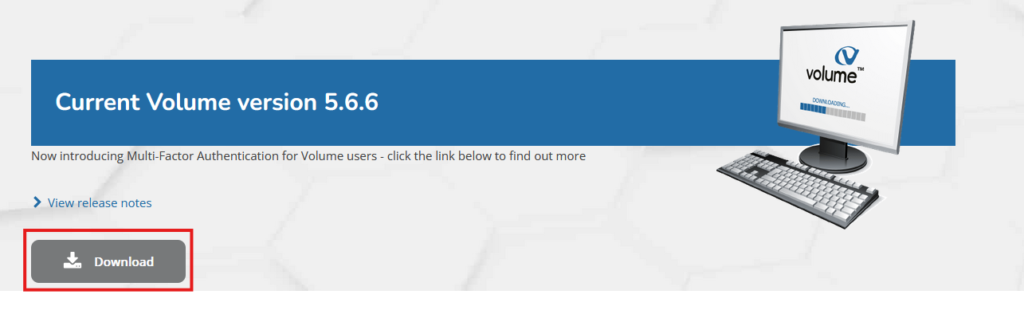
1. Download the Volume installer from https://www.watermarktech.co.uk/support/install/ .
2. Open the file location where the installer is. Typically this will be the Downloads folder.
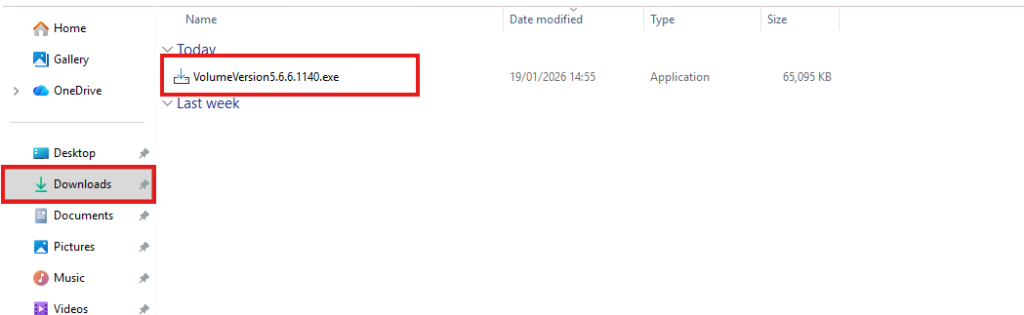
3. Within this file location, create a new file called "NoFirebird.txt". Do this by right clicking in a blank space, clicking "New" then "Text Document".

4. Run the Volume installer by double clicking on the exe file.

Now, the installer will not install Firebird during the Volume instillation process.
Troubleshooting steps for a stuck print spooler
The Print Spooler is software which temporarily stores print jobs in memory until the printer is ready to print them. Sometimes print jobs can get “stuck” in the queue, and this can stop documents from printing.

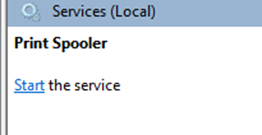
2. In the Services window, scroll down the list until you find Print Spooler and click it.

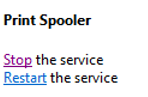
3. To start, click Start. To stop, click Stop.
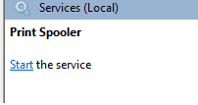
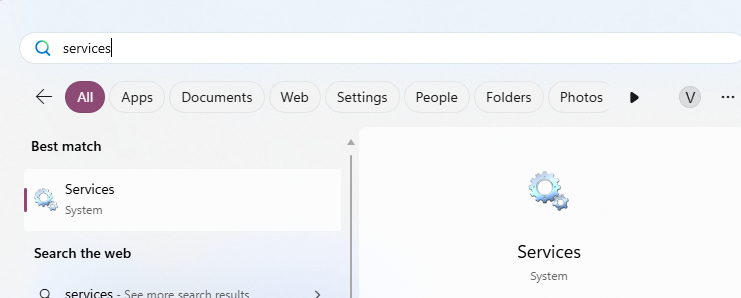
2. In the Services window, scroll down the list until you find Print Spooler and click it.
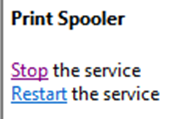
3. Click Stop.
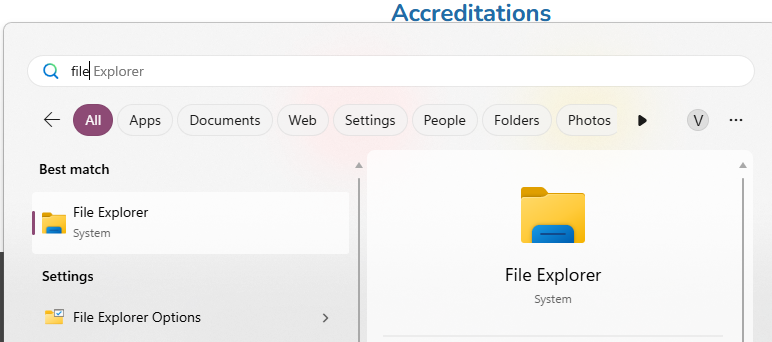
4. Open File Explorer by opening the start menu (or by pressing your Windows key), type File Explorer and press Enter.
5. Navigate to C:\Windows\System32\Spool\PRINTERS then press Enter on the keyboard.

6. Remove all print jobs by pressing Control + A, then Delete on the keyboard.
7. Return to the Services window and press Start on the Print Spooler service. The print queue should now be empty.
We've made some changes you need to be aware of, particularly if you use an outbound firewall
Watermark hosts Volume Remote at two locations – a primary production site and also a secondary failover site. In the unexpected event that a major failure was to occur at our production site, we would switch over to our failover site to allow Volume Remote to continue to function.
The connection details for our failover site are now changing and an update may be required on your local firewall to continue to allow the network connections through to our failover site in the event a switchover to failover was ever made.
Please note that no changes are happening to our production site. The changes would only impact the switchover to failover if there was a major disaster experienced at our production site.
In order to make sure a connection to our failover site is available from your network, please can the following updates be made to your local firewall rules. This change will only affect customers who have restrictions on their outbound firewalls: -
Update the outbound firewall rule for port 4077 to include IP addresses 31.132.4.142 and 178.159.11.249.
Update the outbound firewall rule for port 1433 to include IP addresses 178.159.10.173 and 178.159.11.248.
If you have any concerns or queries regarding this maintenance work, please contact support@watermarktech.co.uk and we will be happy to assist further.
Thank you,
Your Watermark Support Team

IMPORTANT: This change may affect customers who have restrictions on their outbound firewalls. If you think this might apply to your business, please ensure the IT Team (or equivalent) are aware of this article.
Throughout the month of June 2025 planned Volume Remote server maintenance work will be carried out. This maintenance work involves the upgrading of production servers to maintain reliability and security.
The maintenance work is planned for Monday 9th June, Monday 16th June and Monday 23rd June. During these periods there will be a slight drop in Volume Remote access between 8:00pm and 9:00pm.
As part of the maintenance work, the IP address used to connect to the Volume Remote Middle Tier servers will be changing. This change may affect customers who have restrictions on their outbound firewalls. If this change applies to you, it is expected that an already existing outbound rule for port 4077 will exist for IP addresses 178.159.10.174 or 31.132.3.26. Please update your outbound firewall rule to also allow access to the destination server IP address 31.132.4.142 for TCP port 4077. From July onwards, IP addresses 178.159.10.174 and 31.132.3.26 can be safely removed from the outbound firewall rules.
Please ensure this update is applied before Monday 9th June.
As a reminder, customer firewalls should contain the following outbound rules for Volume Remote to function correctly: -
Primary Site: -
TCP port 1433 to destination server IP address 178.159.10.173
TCP port 4077 to destination server IP address 178.159.10.174 or 31.132.3.26. To be replaced with IP address 31.132.4.142 throughout the month of June as per above.
Secondary Site: -
TCP port 1433 to destination server IP address 178.159.11.246
TCP port 4077 to destination server IP address 178.159.11.248
If you are unsure whether these changes may affect you/your site, please get in touch with your own IT in the first instance.
If you have any concerns or queries regarding this maintenance work, please contact support@watermarktech.co.uk and we will be happy to assist further.
Thank you,
Your Support Team @ Watermark Technologies
KB099 How to configure the new Multi-factor Authentication feature in your Volume Document Management Software.
IMPORTANT: Please note - the most recent version of Volume (5.6.5.1105 or later) needs to be downloaded and installed FOR ALL USERS, company wide. Once you've made the decision to upgrade and have started using the new version with MFA, any users within the company that don't upgrade will not be able to access the software.
ALSO: Please note - this upgrade is for Volume Remote users only.
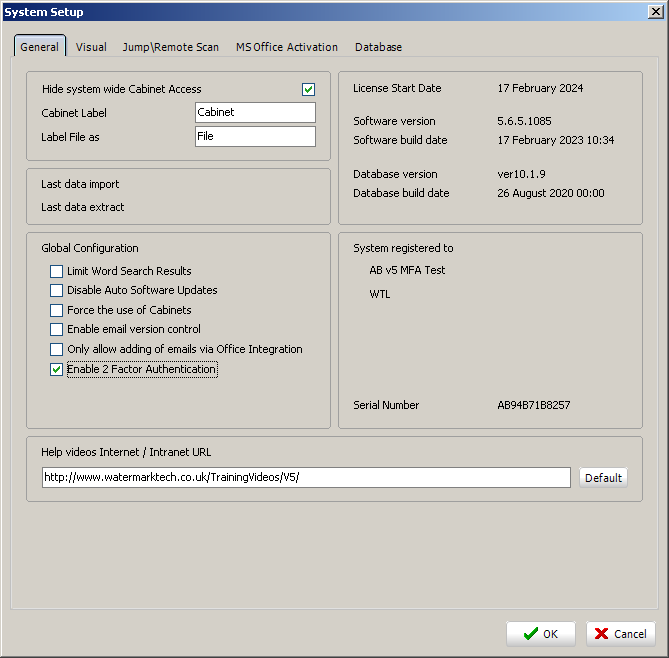
To enable 2FA: Check the “Enable 2 Factor Authentication” checkbox in system setup: -
Click Yes: -

Once enabled, an extra field appears on the login form: -

For the first login of each user, the 2FA Code field is ignored as 2FA has not yet been configured.
For subsequent logins, the code from the authenticator application must be entered as a second password.
First login: After entering a valid username and password, a Timebased One Time Password (TOTP) setup form is shown.
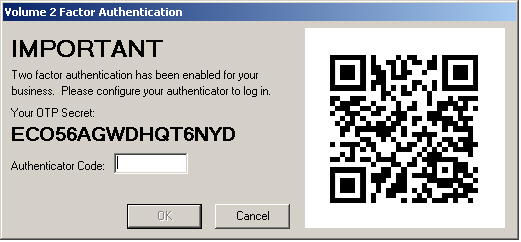
The code may be typed into a standard authenticator application, or the QR code scanned by a mobile phone to automatically add the details. Both the Microsoft and Google authenticator applications are supported.
When scanned with the Google Authenticator application, an entry will be created with the format:
Volume:USERNAME@DATABASE e,g, Volume:ANDY@ABVRMFA indicating that the username is ANDY and the code relates to the database ABVRMFA.
A valid token code must be entered from an authenticator to continue. Clicking cancel will issue a warning and allow Volume to close: -
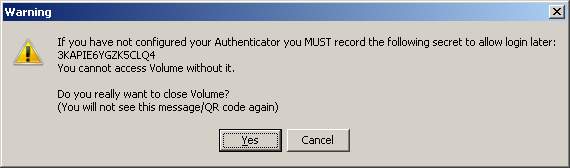
If a user ignores the warnings in an attempt to skip the TOTP setup, they will be locked out of their account. In this event, User Maintenance can be used to reset the process: -

To authorise the reset of a user’s 2FA settings, the user actioning the change must enter their own code.
A user's Volume can be set to help out the server with processing documents through OCR, but this can cause the user to experience interruptions where the OCR process takes control of the PC. When this happens a 'G' icon will appear on the task bar.

If the OCR process disrupts normal operations it can be switched off.
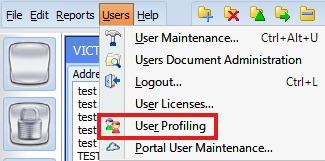
Click on 'Users' at the top in Volume, then select 'User Profiling'
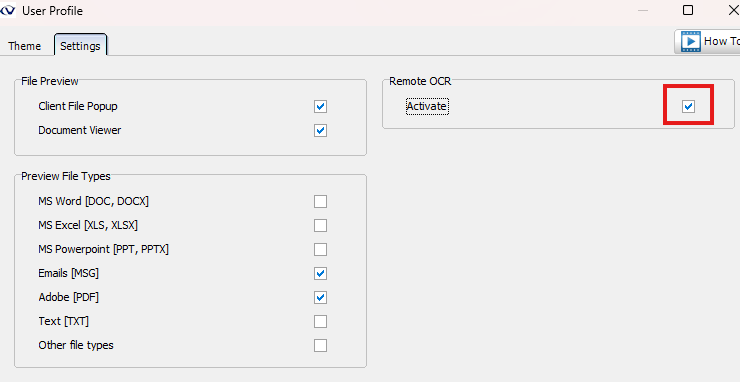
On the next screen remove the 'tick' from the 'Activate' box and click 'OK'. This will disable 'Remote OCR' and stop the user being interrupted by the background process.
To make the changes take effect close and reopen Volume.
Occasional images scanned to a hot folder can fail to appear in Volume, this is often down the 'polling' process stopping. Exiting Volume and logging back in will re-start the process. If the problem remains, follow the steps below to determine the reason. You will need to know the location of your hot folder.
To do this you will need 'superuser' access. Click 'File'->'System Setup' and select the 'Jump\Remote Scan' tab.

N.B. Your system may be set up with multiple hot folders.
Volume needs full control of the hot folder. To test this when logged in to windows as the windows user that will be running Volume, type the full hot folder address into the windows 'run' box (Win+R).

Once in the folder test that the user can create and delete files.

If you cannot create and remove files, adjust the permissions accordingly.
Next, you need to check the permissions of files created by the scanner.
With Volume shutdown, scan a document. The image file will appear in the hot folder. The user should be able to delete the file. If the user cannot delete the file then please adjust the permissions accordingly.
Some incompatible items may have been inadvertently transferred in to the hot folder. These items can cause the 'polling' process to fail. When the user logs out and then back in to Volume the polling process is restarted, but if the incompatible item is still in the hot folder the polling process will fail again when it tries to process the incompatible item.
To resolve this issue:
If steps 2 & 3 do not resolve the issue then it may be that the image the scanner is creating is not compatible with Volume. To test this, turn on debug by pressing CTRL-ALT-D together, then drag/drop the image from the hot folder to your desktop, then from the desktop to the 'Pages to be Placed' bar if the image does not appear on the 'Pages to be Placed', then the file must be of the wrong compression type and an error will eventually appear.
It is important that the correct compression and file type are selected otherwise Volume will not process the images. The TIFF file format can produce a single file containing multiple pages and should be selected in the options. This format will keep the pages in order. CITT Group 3/4 compression type is supported which will produce simple black and white images (not grey scale). LZW is also supported for TIFF where both black/white and colour images are both supported in the same multi-page file. If LZW is not supported then JPEG can be used. This must be set to True or Full colour..
New feature introduced in v5.6.4.2
All machines must be upgraded to version 5.6.4.2 in order to use these options without issues.

On the date specified, the box contents are moved automatically in to the "Shredding Queue", which is then accessed from within "Reports" - "GDPR Shredding Report".
During the retention period, a warning will appear on the box should a user wish to shred or delete the box. At the end of the retention period, the notification will automatically be removed from the box.
N.B Should a box also require shredding after the retention date, both dates should be completed.

Shredding Queue details the boxes held within the shredding queue, requiring action.
Shredding History details the boxes which have been shredded by:
Retention Queue details the boxes on which a retention date has been added.
Retention History details the boxes on which a retention date has passed by:
Expiry Queue details the boxes on which there is a shredding date which has not yet been reached.