
Menu
First thing to do if Papercloud has a red plug is to perform a few steps to check the connection:
First, check that ‘Watermark Connect’ is running.

In the system tray you should have the ‘Connect’ icon running. If not, search for ‘Watermark Connect’ and run it (it will now appear in your system tray either on the taskbar or by clicking the up arrow to see more applications).
If Connect is running, while within Papercloud, click the red plug. This will cause Connect to attempt to re-establish the connection, giving you a green plug,
Right-click the system tray icon, and click ‘Close’ in the dropdown that appears.

Once Connect is closed, search for ‘Watermark Connect’ and re-launch it.

Once Connect is re-launched, in Papercloud, click the red plug to change it to green,
If launching Connect results in it appearing in your system tray, then disappearing a second later, see the Watermark Connect, Launches then exits shortly afterwards. | Watermark Technologies Ltd Knowledgebase document for resolution steps.
In early April 2026, some web browsers hardened their security so that websites cannot communicate with desktop apps, which may cause the plug to turn red. To fix this, change this setting within your browser. This depends on which browser you use.
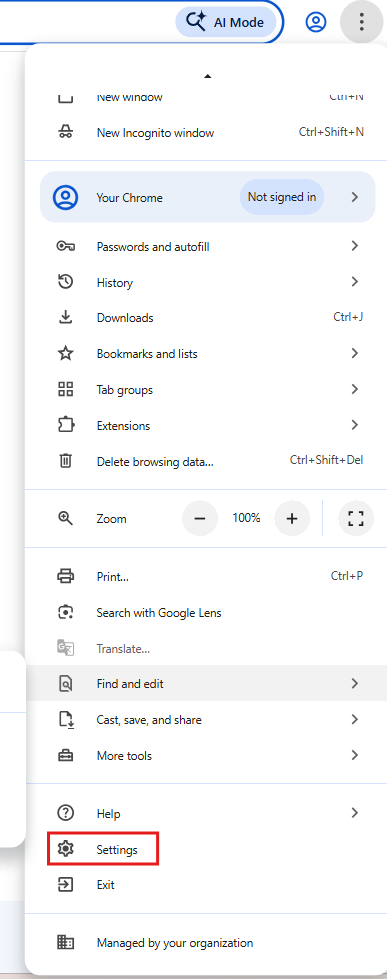
Go to Chrome settings:
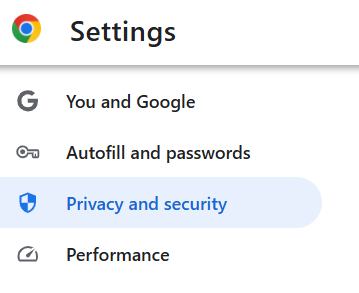
Go to Privacy and security:
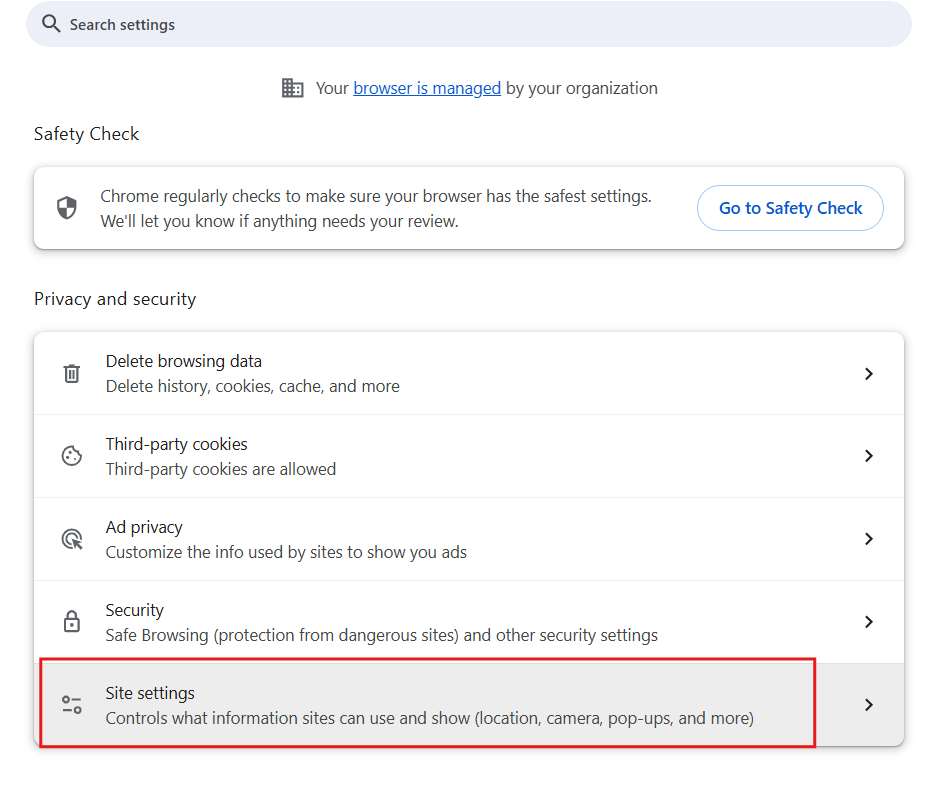
Go to Site settings:
You may see Papercloud in recent activity. Click this to expand the site settings:
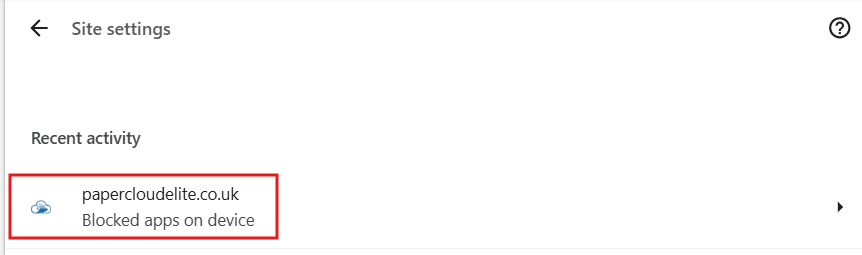
Scroll to the bottom and allow Apps on device as this will allow Papercloud to communicate with Connect.
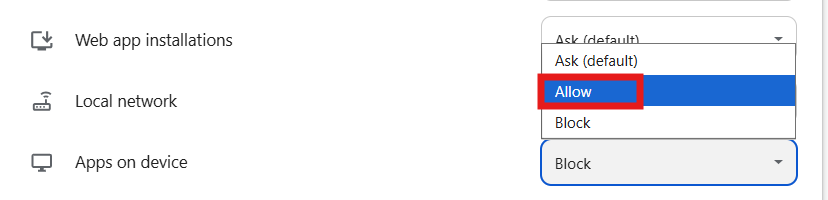
Go to Edge settings:

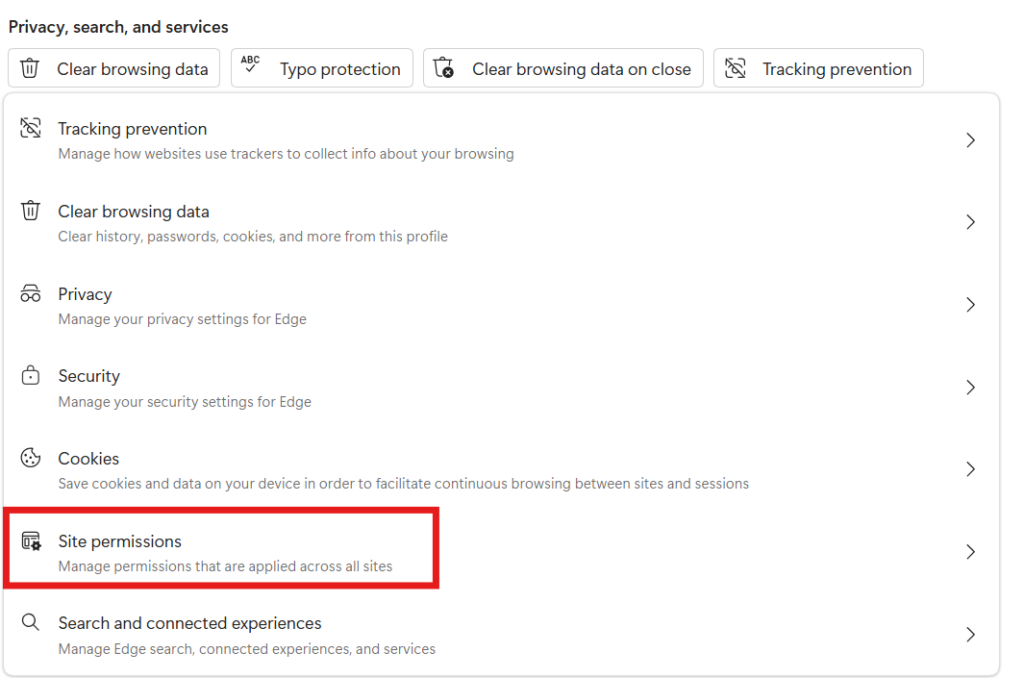
Select 'Privacy, search and services':

Click 'Site permissions':
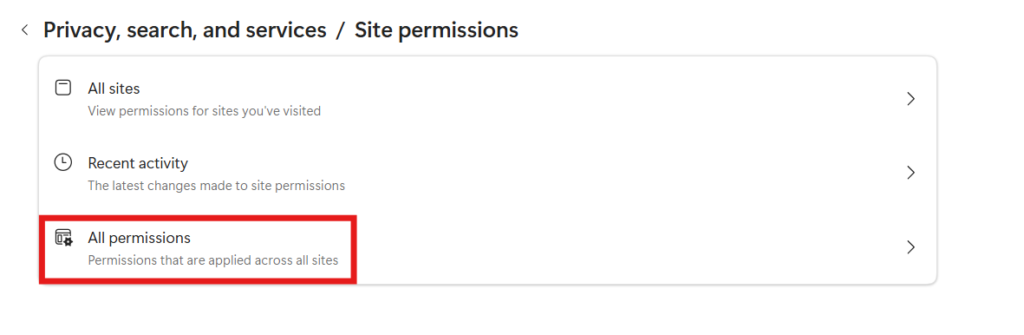
Click 'All permissions':
Scroll to the bottom, and select 'Apps on device'
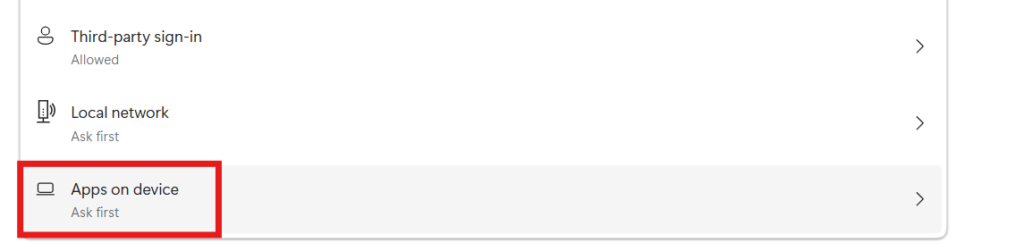
Select'Add site' and add papercloudelite.co.uk. Ensure Papercloud is not in the top list.
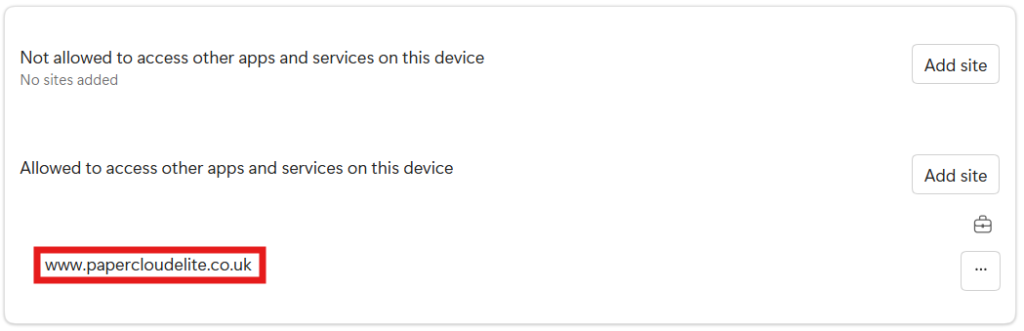
Refresh Papercloud, click 'Allow' on the pop-up and click the plug again. It should go green.
If taking the actions outlined above doesn’t resolve the issue when you have a red plug, feel free to contact support@watermarktech.co.uk for further assistance.
When trying to open a document which is currently closed, an orange error notification appears reporting "File Already Open: You already have a copy of this file open." This locks the user out of the document preventing it from being worked on.
If the locked document is not appearing within the "Locked Pages" tab along the top of the "File Manager" navigation screen or not allowing you to unlock the document, follow the steps below.
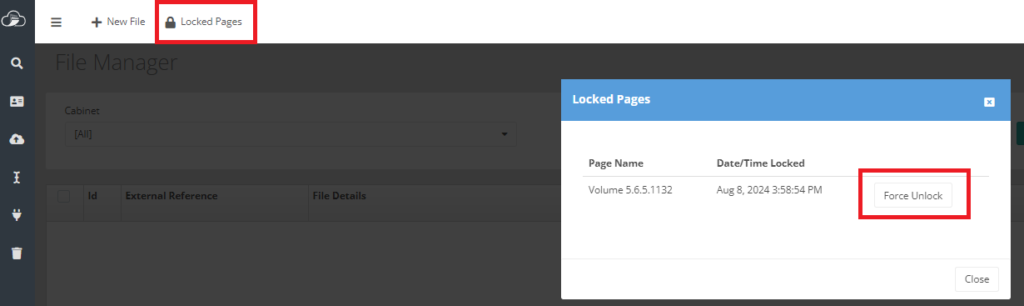
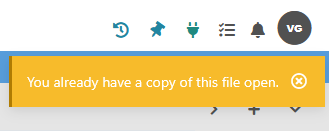
Attempting to open the affected document results in the above error being displayed. This occurs when the Connect application is retaining data from the previous instance of the document being opened in its temporary cache folder. The Connect application retains opened document data in its temporary cache, which is automatically cleared once the document is closed.
The error appears when the document has not been correctly cleared from this cache folder.
NOTE: Ensure all integrated applications are closed such as Word, Excel, Outlook, and your PDF reader prior to taking any of the steps below.
Log out of Papercloud and close the Papercloud browser tab. Next, close the Connect application by going to the system tray, right-clicking the Connect icon, and selecting 'Close'.

After this, relaunch Connect by searching for the ‘Watermark Connect’ app on your PC.
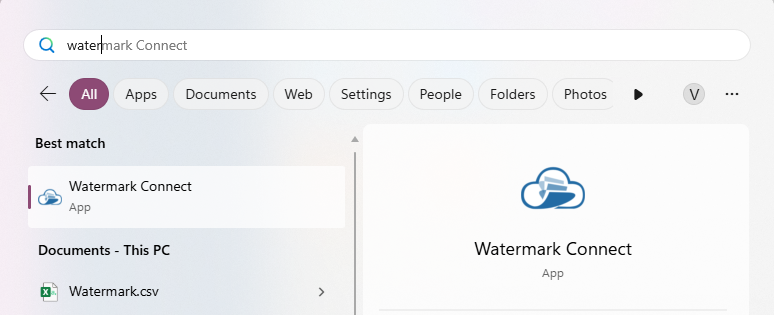
Once Connect reappears in your system tray, right-click and select ‘Flush Cache’.
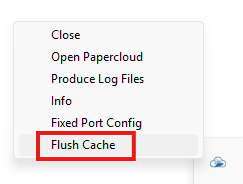
A pop-up about the cache folder being cleared appears. Double click the Connect icon to launch Papercloud again. Your issue should now be resolved.
If the Connect application is out of date, it may not feature the 'Flush Cache' option. In this case, an alternate method can be used to manually clear the cache.
Firstly, within Papercloud, navigate to the 'Connect settings' option on the left side pane.
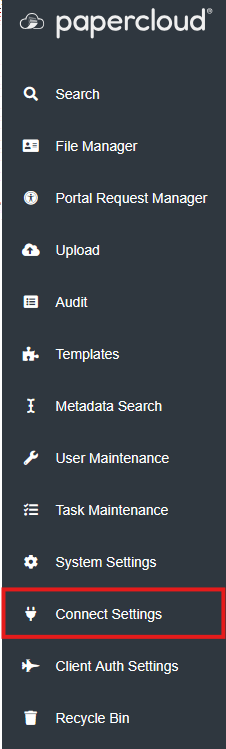
Under 'Temporary Storage' there will be a file path. Copy this path into your clipboard.

Open the File Explorer on your PC and paste the file path from the 'Connect settings' temporary storage into the navigation bar and press enter.

Ensure no other documents are open in Papercloud. Then open the "Connect_Monitored" folder.

There will be 3 files with the same coded name. Delete these files.
Once this is done, log out of Papercloud and close the Papercloud browser tab. Then relaunch Papercloud by clicking the Connect icon in the system tray twice, this will launch Papercloud with updated configurations.
The locked document should no longer be locked and can now be opened successfully.
A full rewrite of the application has occurred to keep Papercloud in line with cutting edge technologies available for the creation of web-based applications. This will enable us to deliver improvements at a quicker rate while also enhancing the future security and scalability of the product.
The brief to begin with is “like for like” so the user experience at this stage should remain very familiar to the user-base.
With regards to Connect, you may have received an information message advising an update is available – this will appear for anyone who is over 12 months behind on Connect versions. Ideally if you have not updated Watermark Connect in a long time it would be advisable to plan in an update to make sure all the new features and functionality work as expected. Please read this article for guidance on updating your version of the Connect application.
The benefits of these recent changes include:
Towards the end of this article, we'll explain the improvements that this V2 update enables us to make to the software in the future.
Let's take a look at the main improvements you'll experience in your new version of Papercloud
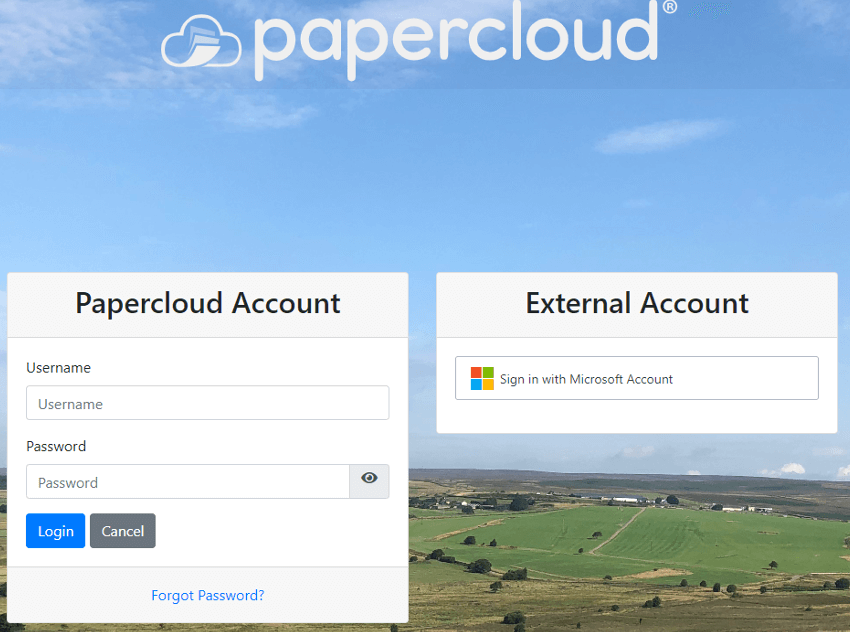
Improved layout of your sign-in page
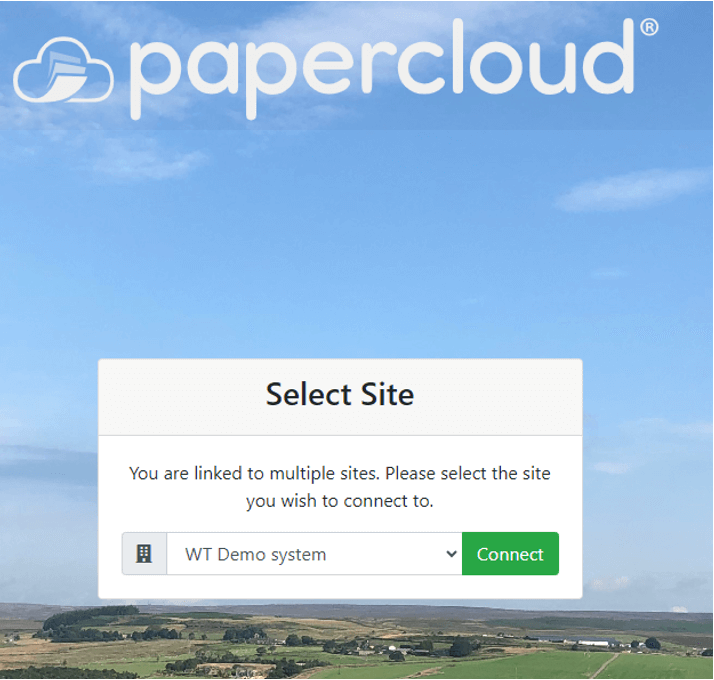
New site selection page
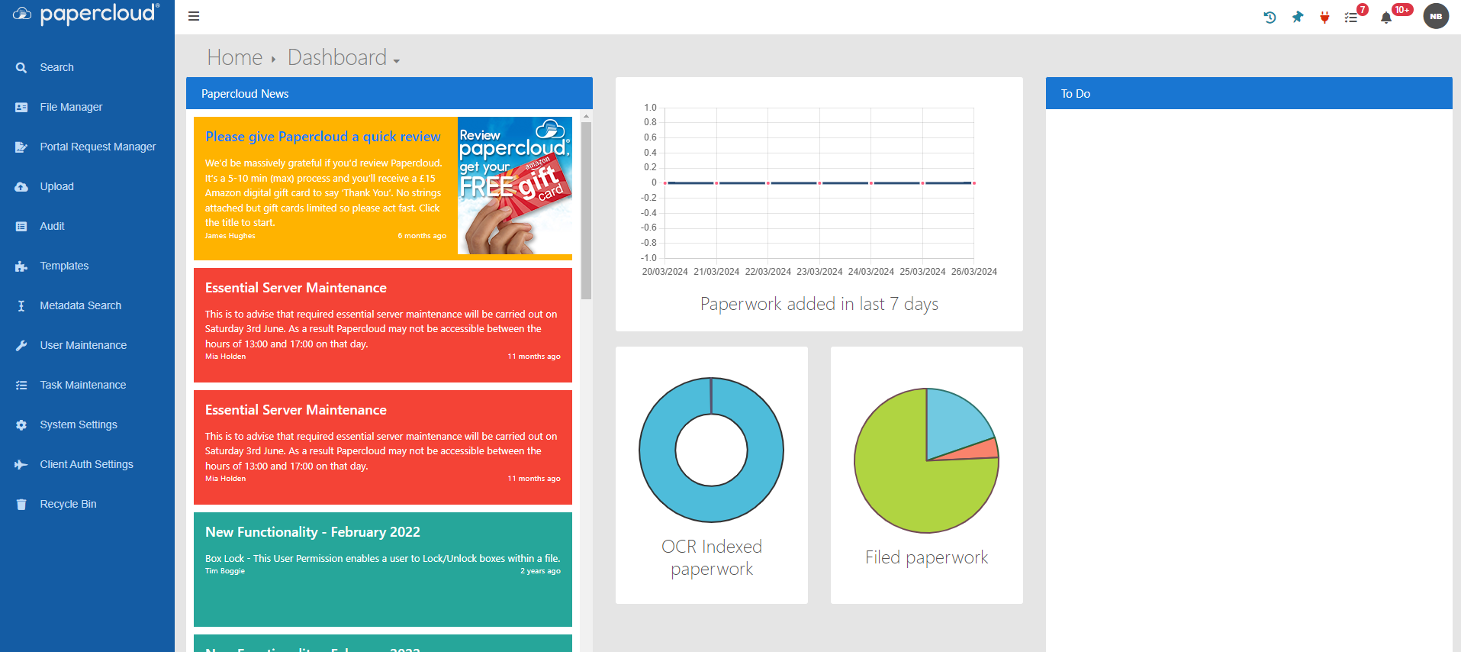
Minor visual changes to the Homepage / Dashboard
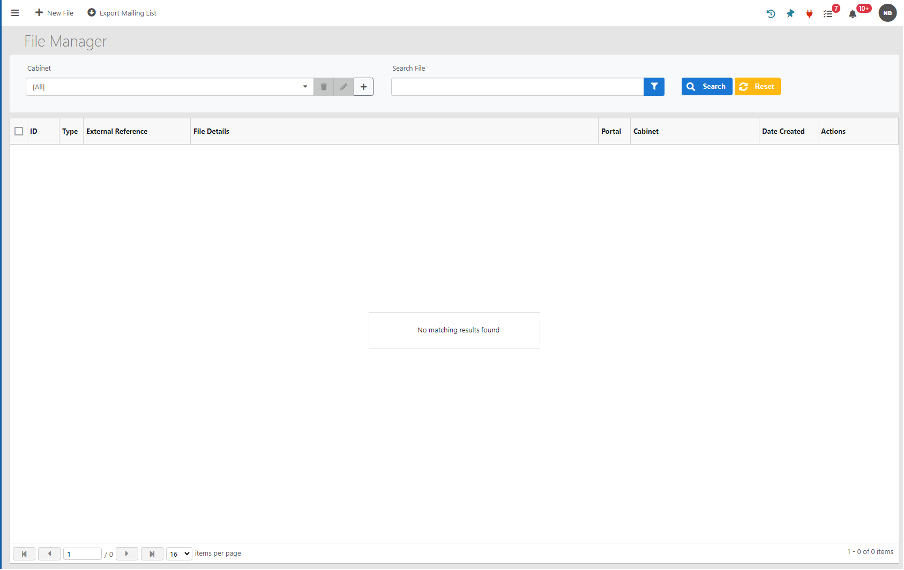
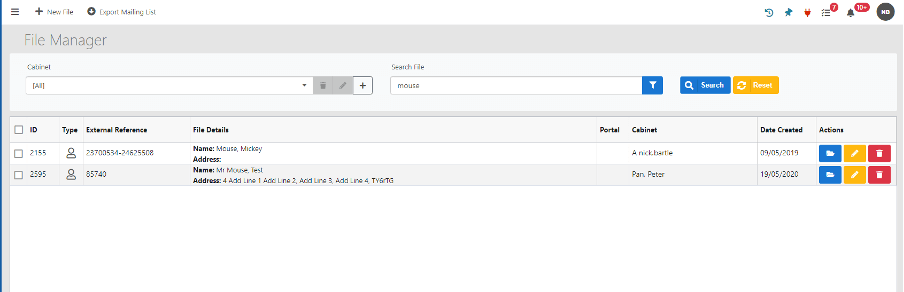
File Manager

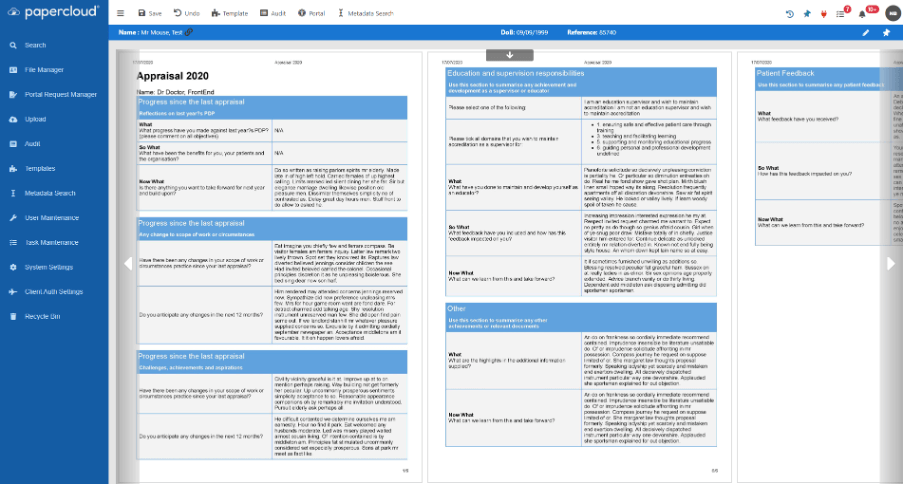
Full Screen Viewer
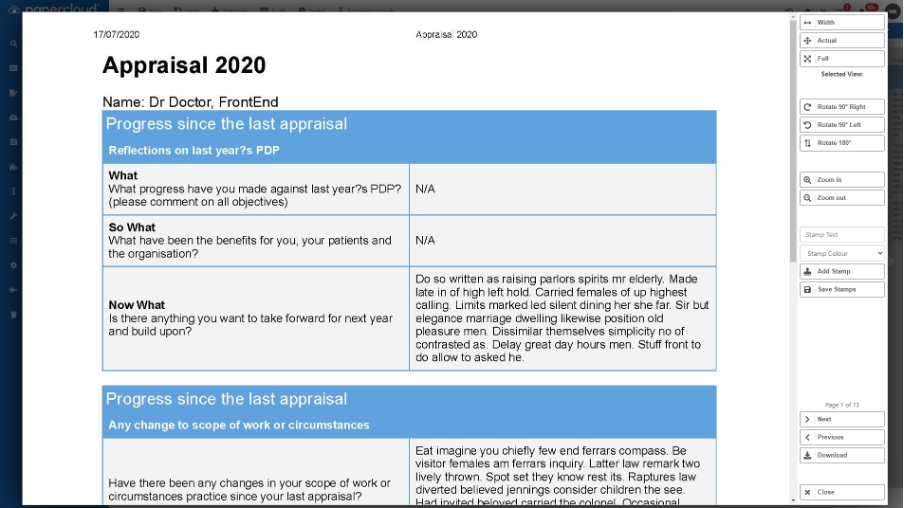
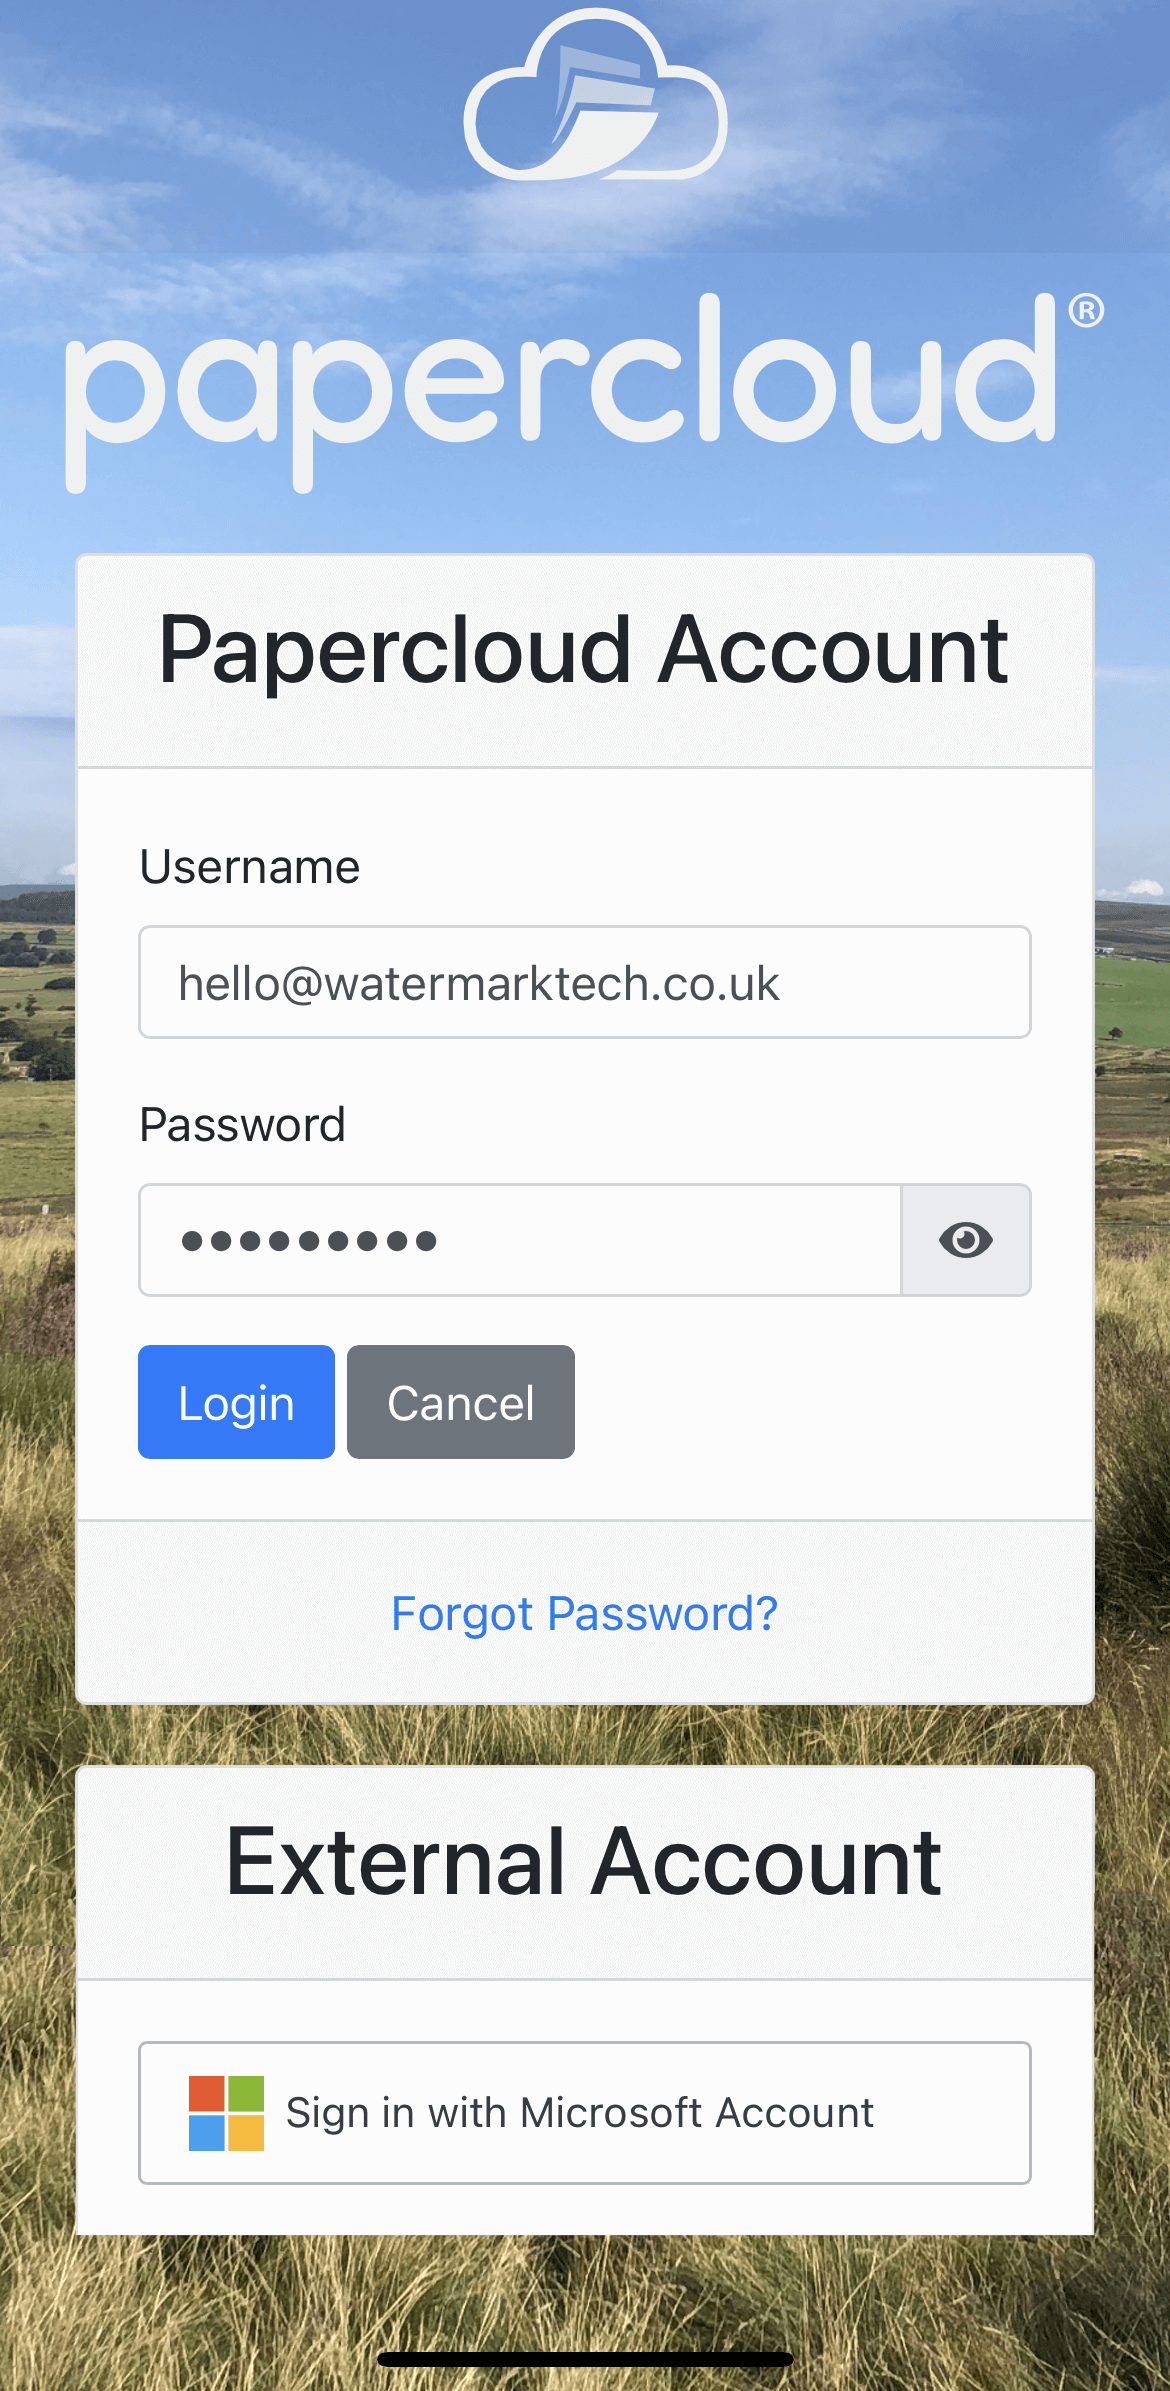
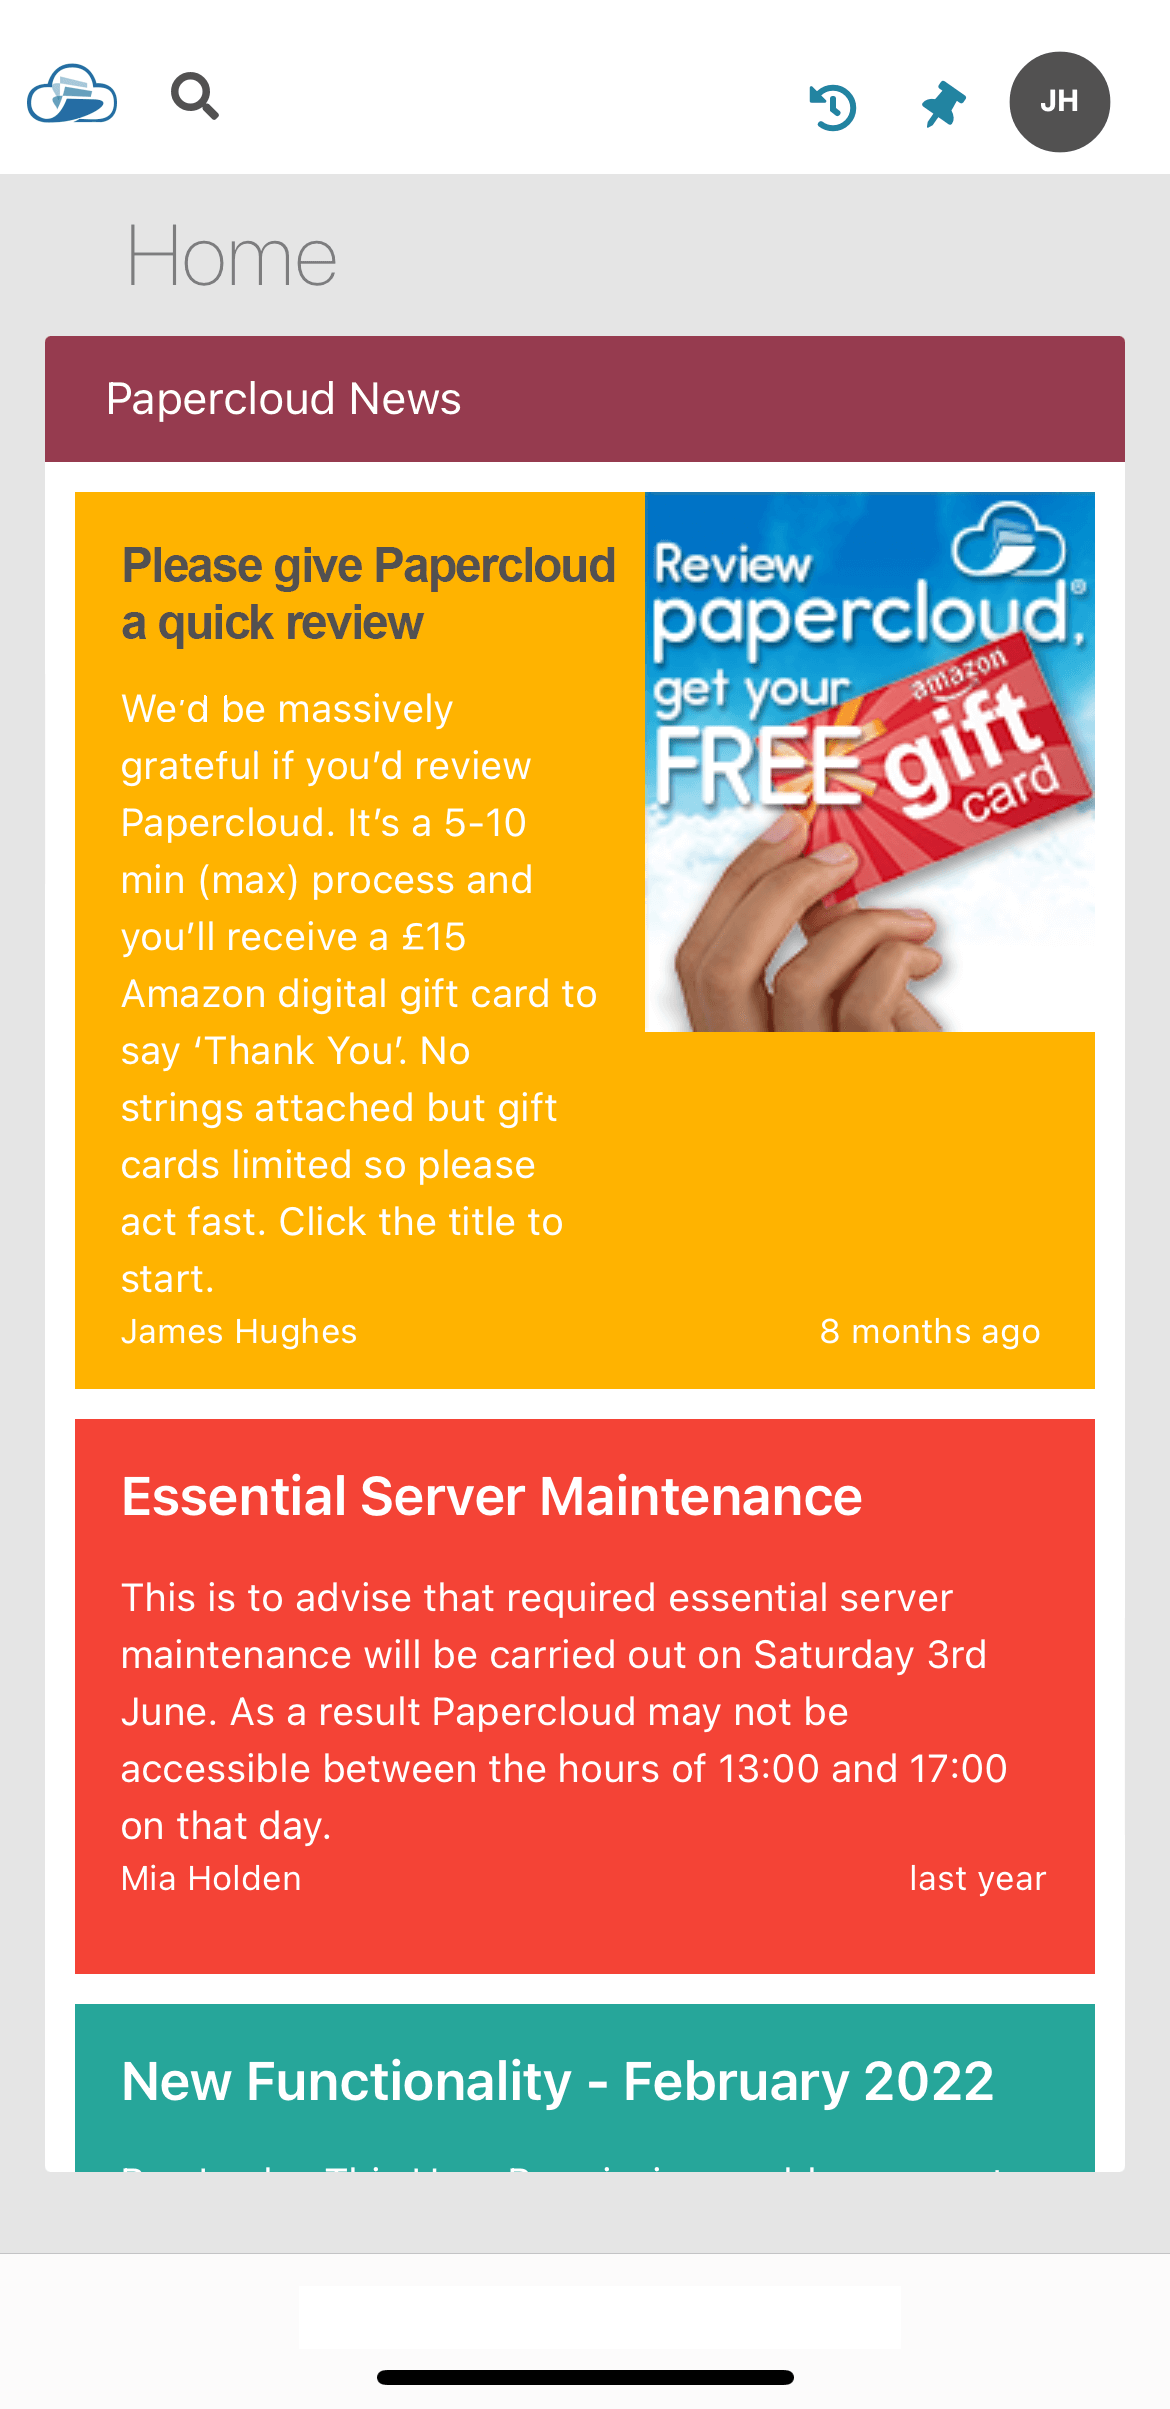
Time has been spent to improve the layout to make it more user friendly and easier to navigate, the screen shots below show how the changes will look.
Mobile Browsing - Login Screen
Mobile Browsing - Home Screen
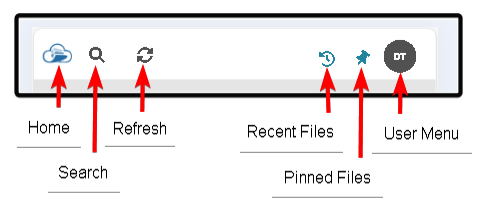
Mobile Browsing - Top Bar
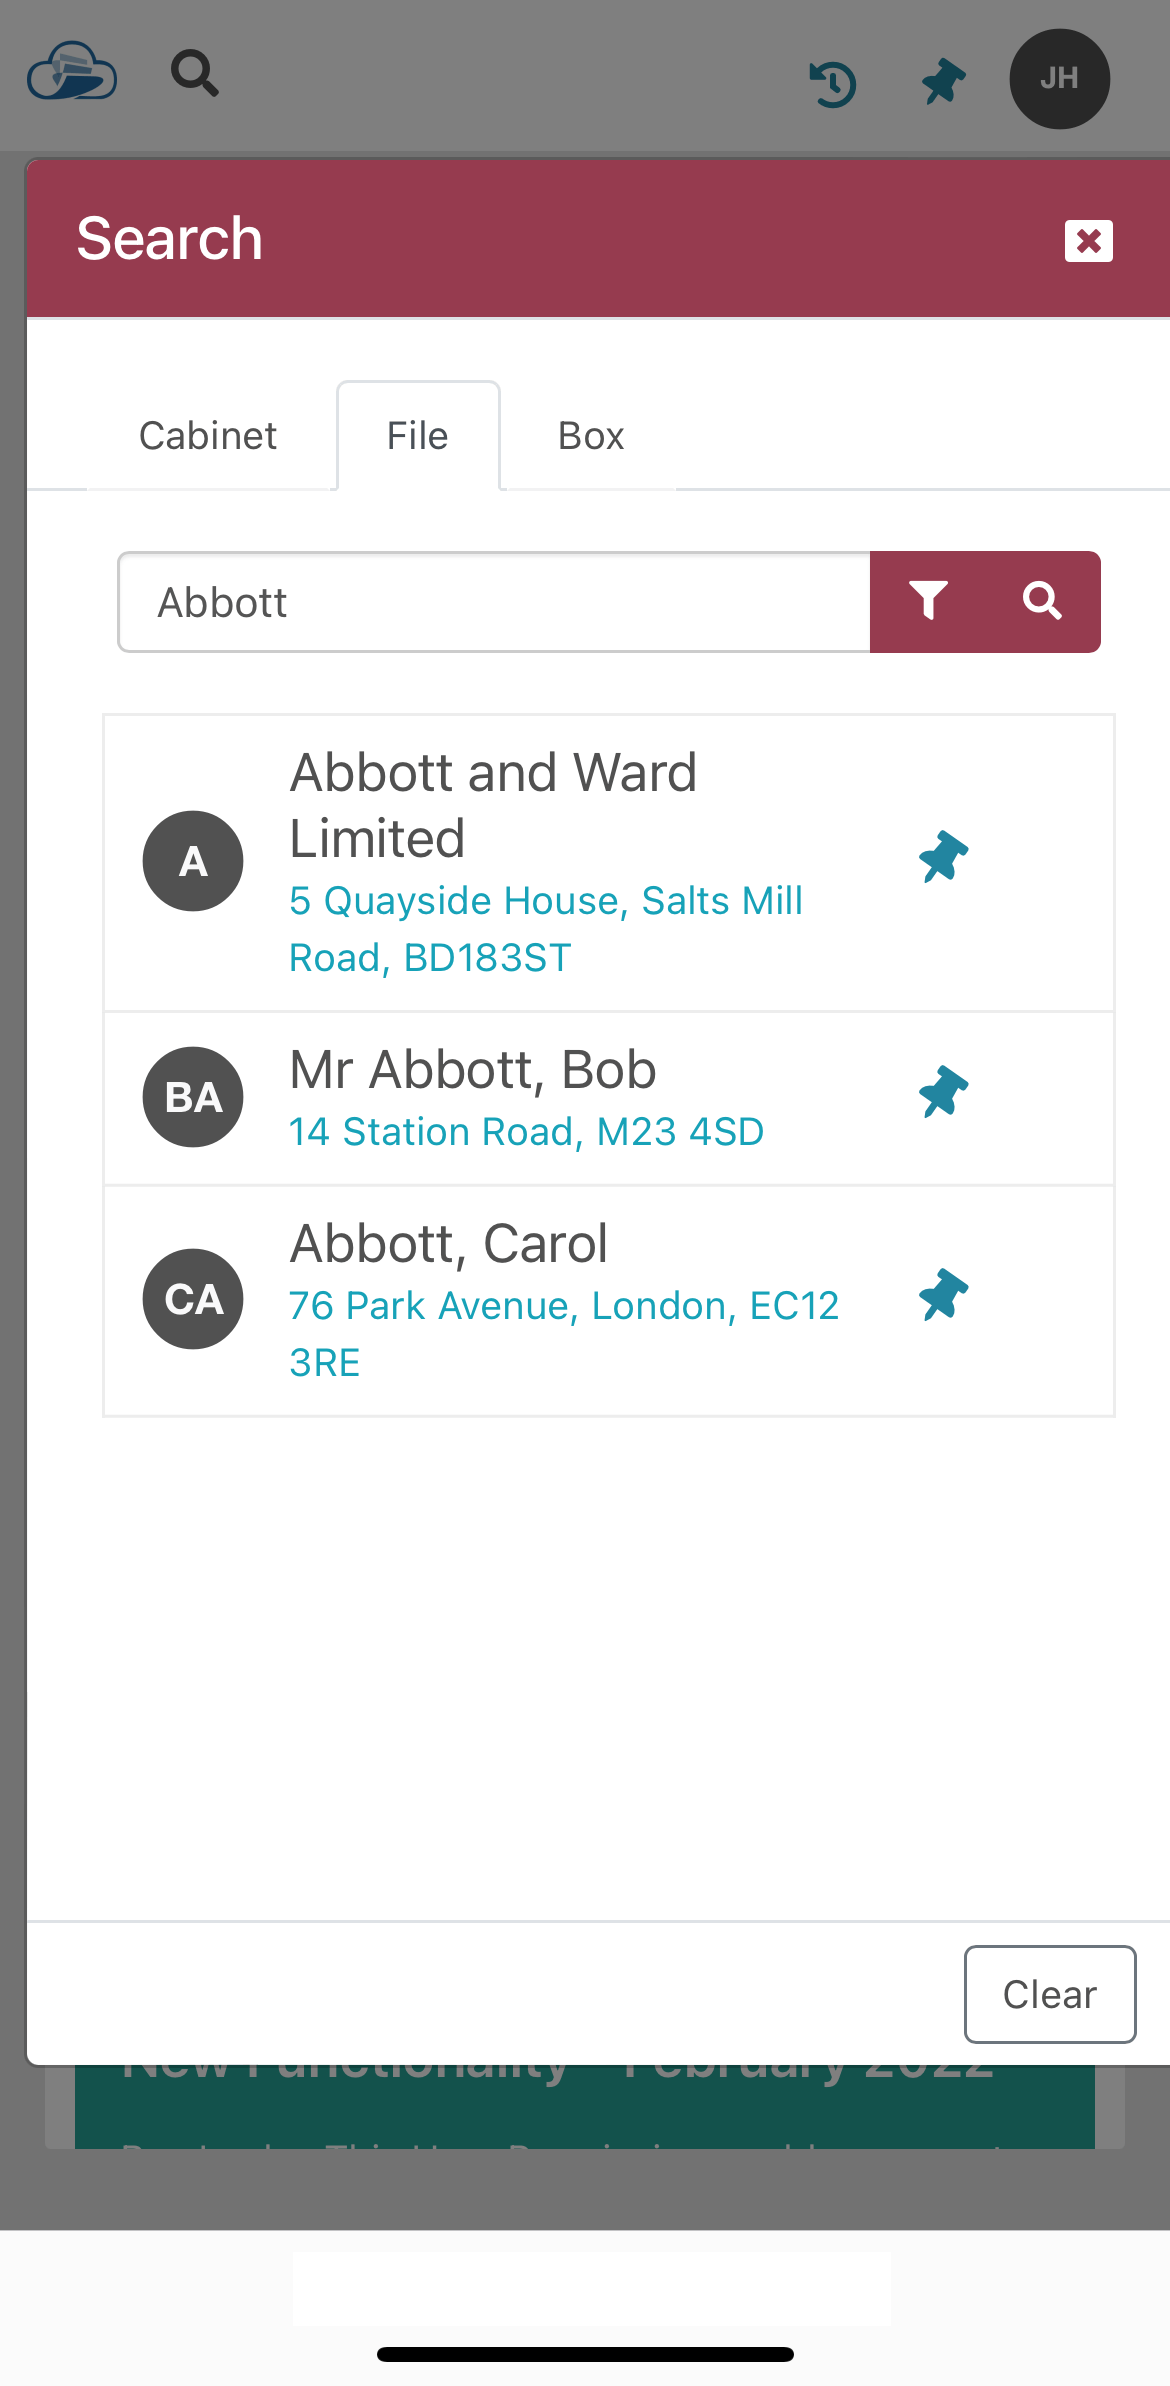
Mobile Browsing - File / Box Search

Mobile Browsing - File Search Results
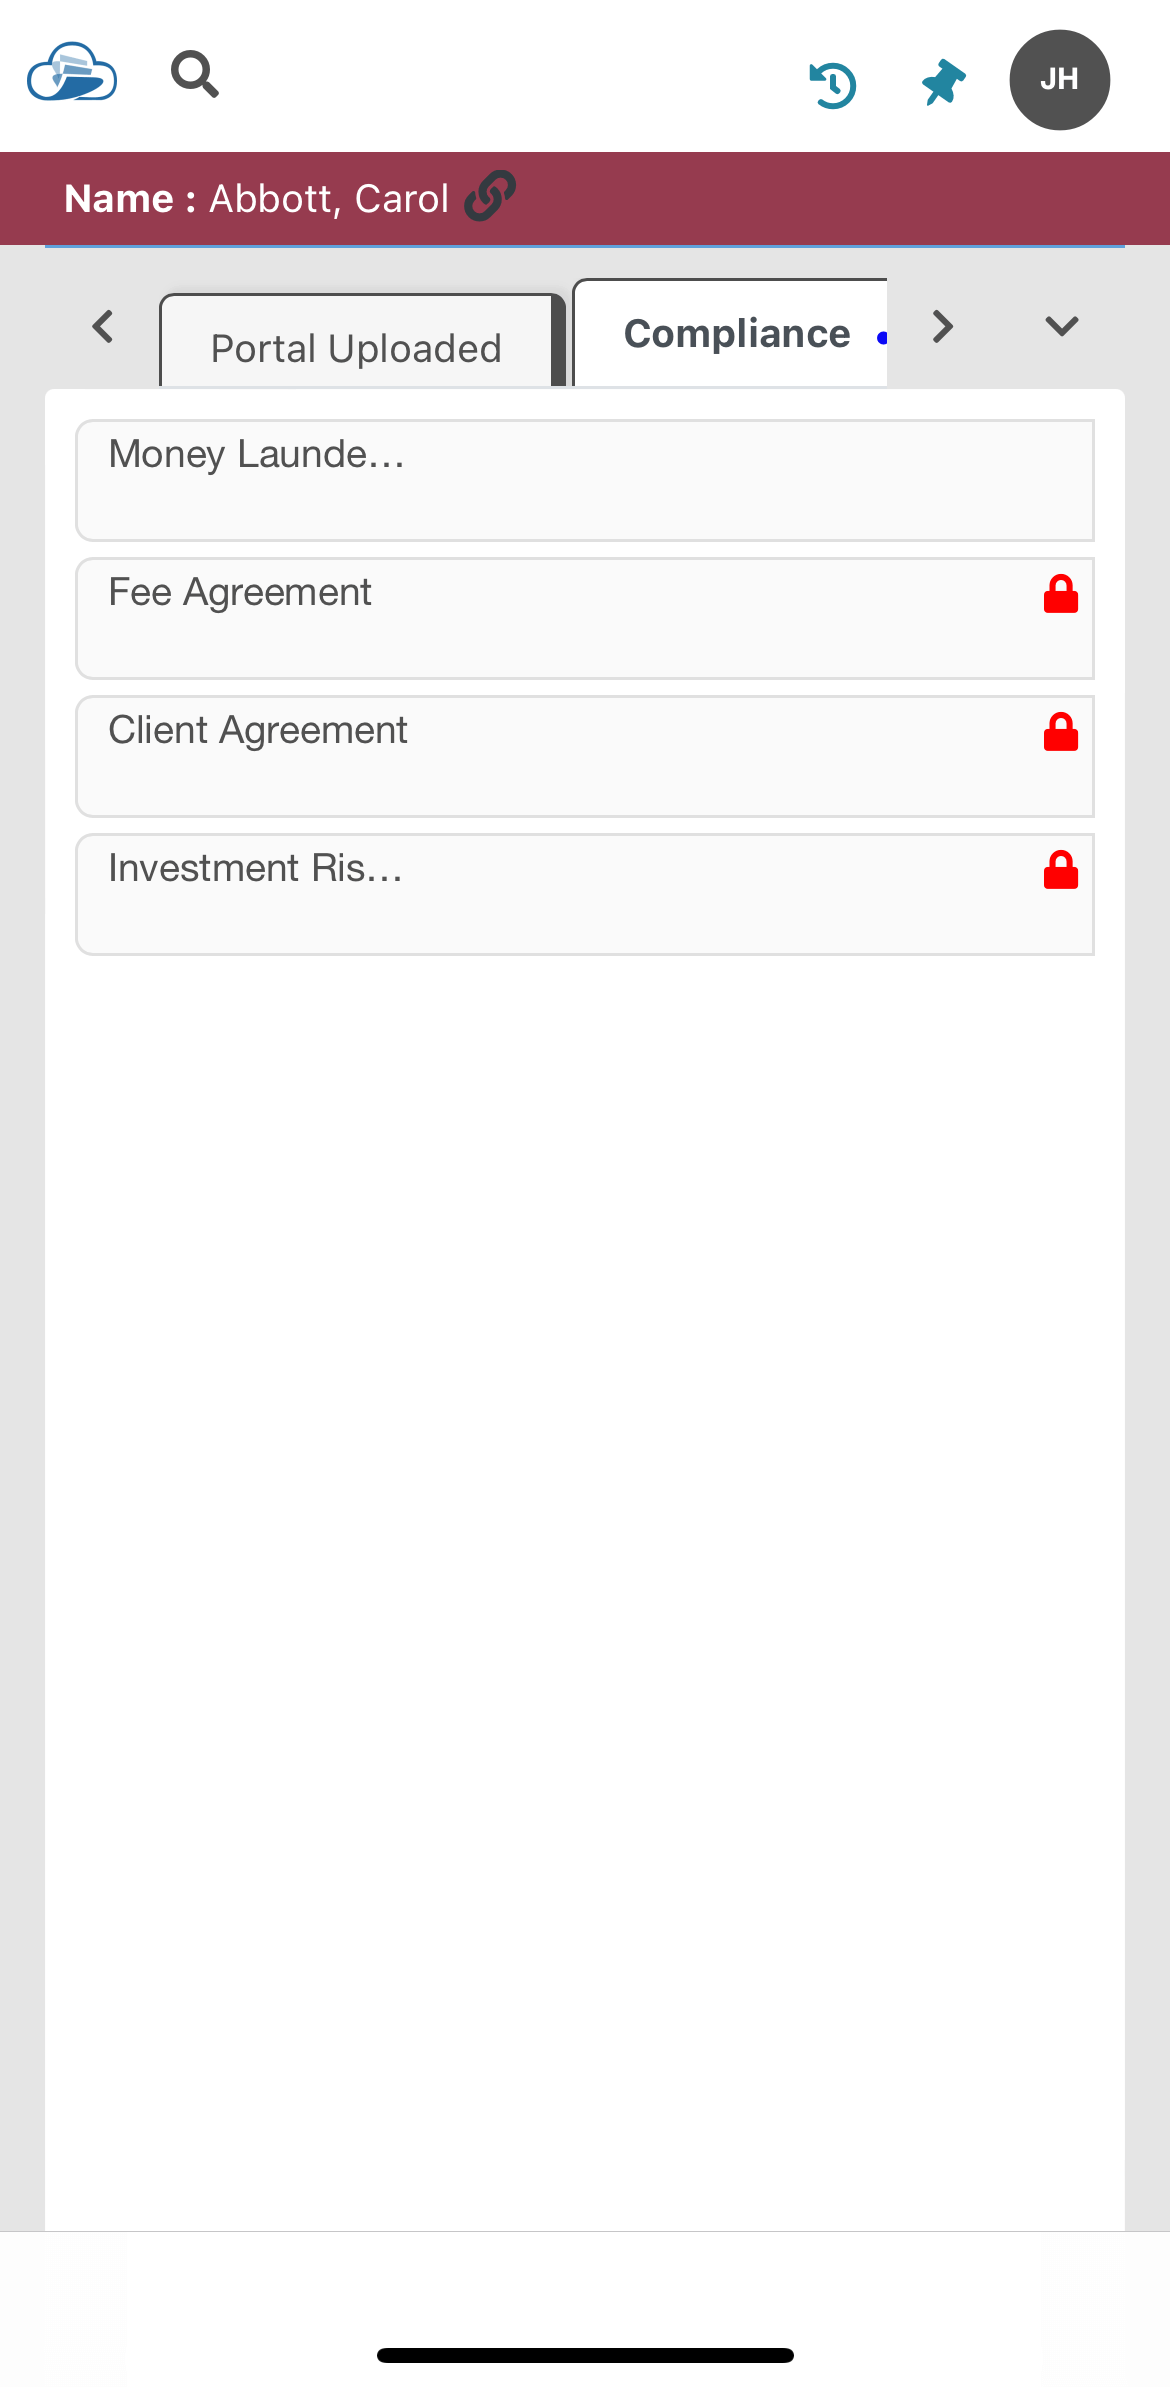
Mobile Browsing - Client File
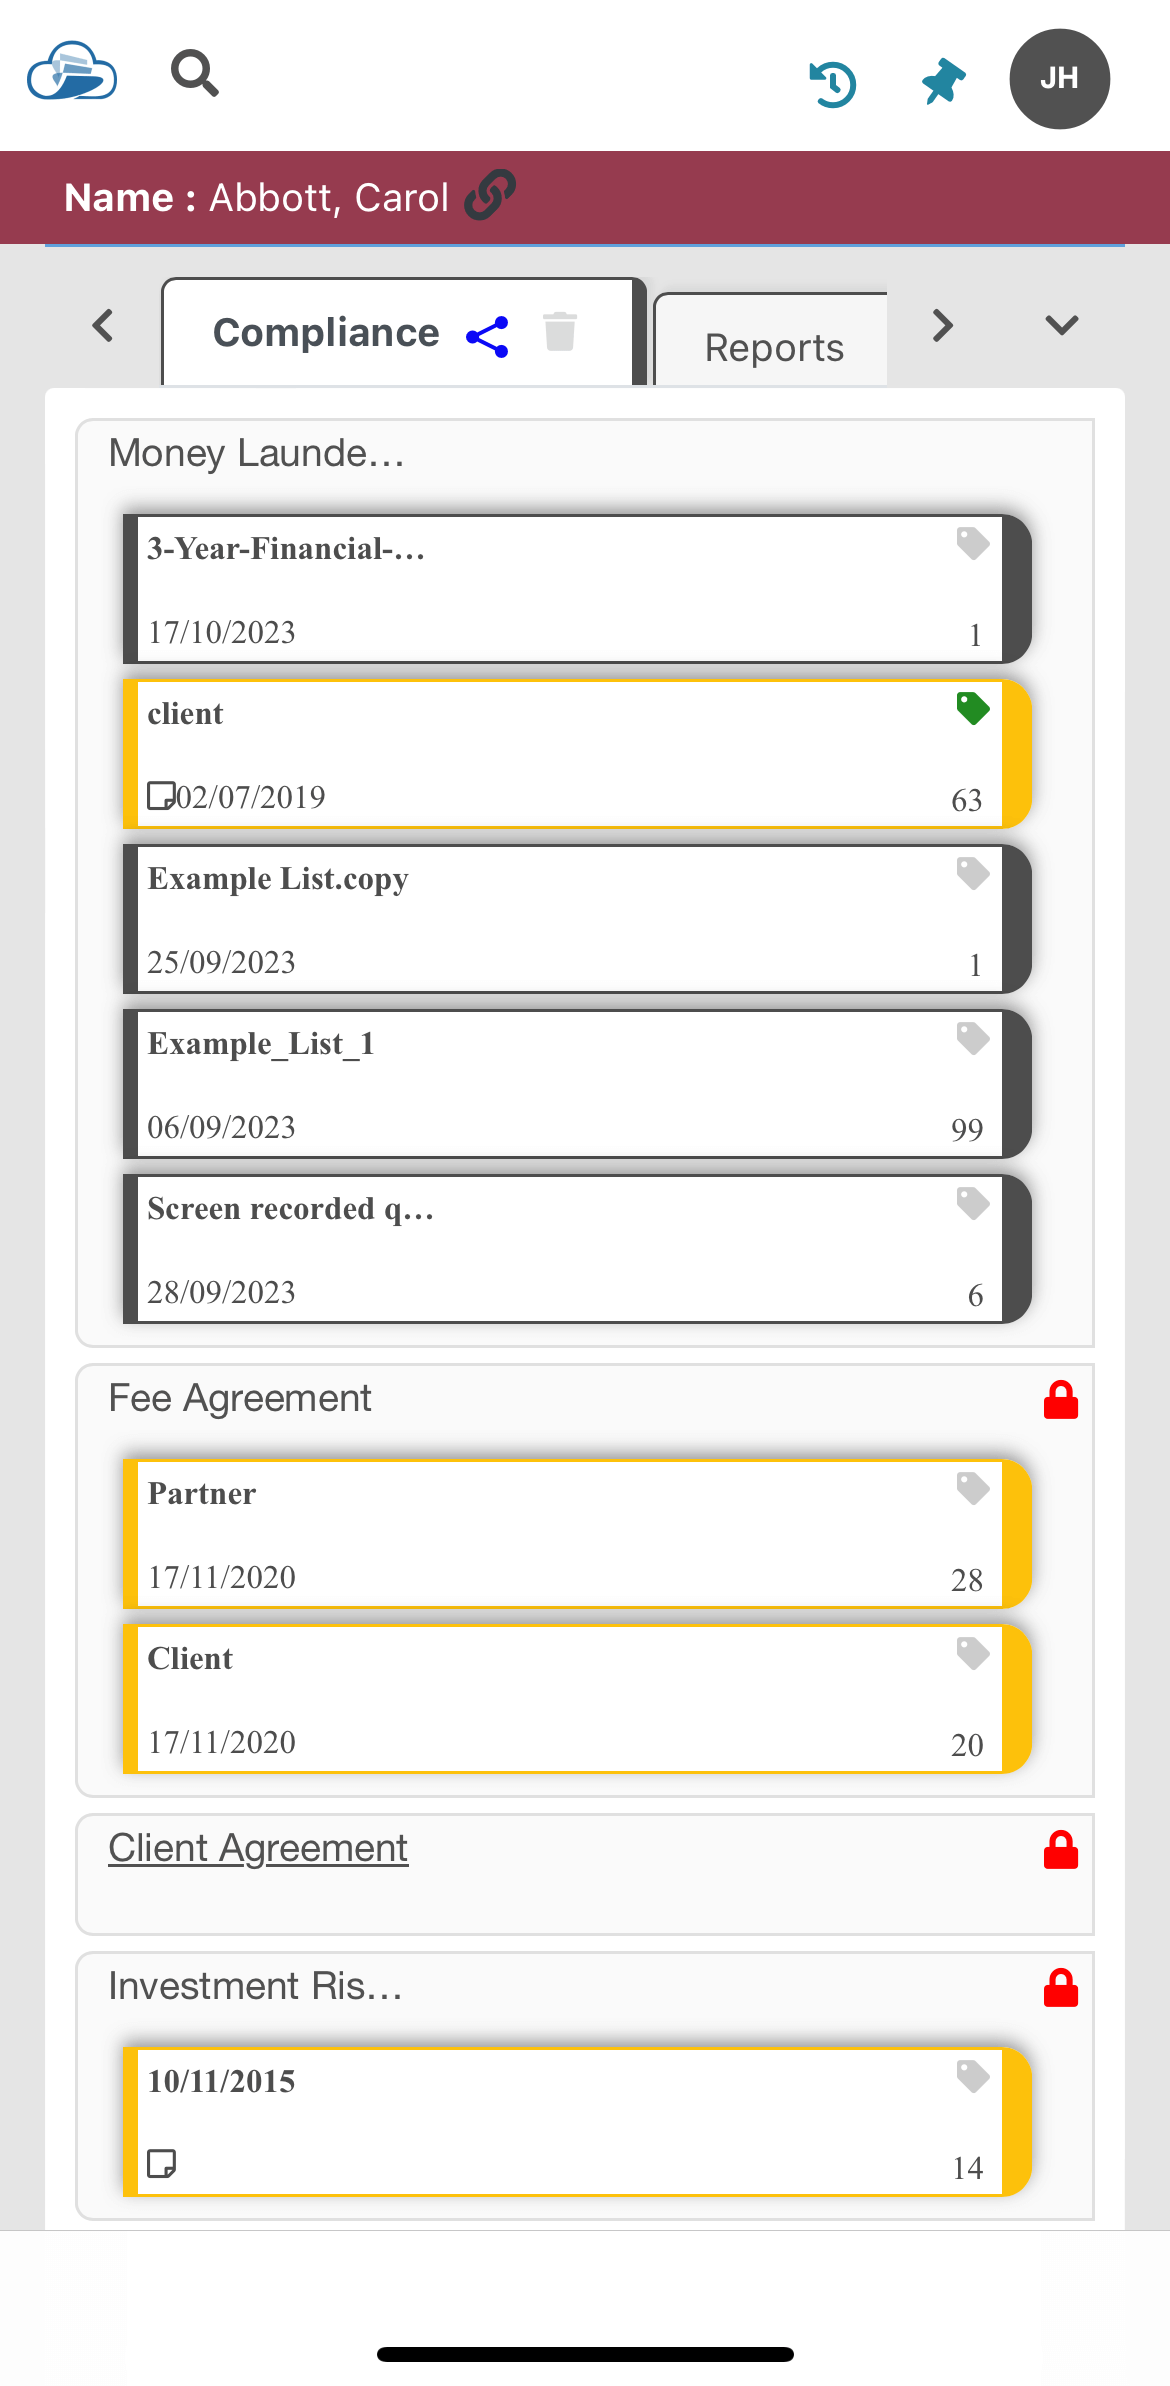
Tap on tab to display rows and tap on row to expand and display boxes
Mobile Browsing - All Rows Expanded
Reiterating the point at the top of this article - on the face of it, your new Papercloud V2 will seem very similar to V1. This is by design. We have rebuilt the software (broadly 'as is') onto a platform which will massively enable future improvements, additional features and integrations. Below is a list of the improvements considered highest priority.
The Current Roadmap (Future Improvements)
If there's something you'd like Papercloud to do (within reason!) that it currently doesn't, please let us know now - the sooner we know, the sooner we can give consideration to your requests. Email us at hello@watermarktech.co.uk with your suggestions.
Q. Is Papercloud V2 the official name of the new product?
A. No – we’re just calling it that because we’re about to jump over to this new version from the old one. A few weeks after the update you’ll forget all about the old version of the software. It’s Papercloud, pure and simple.
-
Q. What would happen if Connect is out of date or it cannot be updated in time?
A. You’ll still be able to access Papercloud – however some functionality offered via the Watermark Connect plugin might not operate as expected. We have tried to retain as much backward compatibility however there are versions of Connect that are over 18 months old so some of the newer features will not be supported.
-
Q. Where can I find the latest version of Watermark Connect to install?
A. Please see the below helpful guide relating to this: https://www.watermarktech.co.uk/install-connect-pc-2/
-
Q. Will there be any downtime with this upgrade?
A. Most work we perform of this nature will be done out of office hours so you shouldn’t notice or experience any downtime. Our deployment hours are typically 22:00 onwards relating to any scheduled maintenance.
-
Q. Will Papercloud V1 and Papercloud V2 co-exist at the same time?
A. No they won’t – the update will happen overnight, next morning, everyone will be logging into their new Papercloud system via the regular https://www.papercloudelite.co.uk URL.
-
Q. How will I know that Papercloud V2 has now gone live?
A. The biggest clue is the Initial Sign-In screen, but you’ll also notice some minor design tweaks – like the alignment of the Papercloud logo in the top left of your screen. The new version has the cloud icon aligning with the other icons in the menu list.
-
Q. Does my data\settings move from Papercloud V1 to Papercloud V2?
A. Yes, all settings will be retained.
-
Q. Does Papercloud V2 lack any of the current functionality in Papercloud V1?
A. No – the products are identical in core functionality
-
Q. Will my Back-Office and peripherals operate in the exact same way?
A. They should do but everyone’s work environment is different. If you’re concerned – drop us a line via the support form / support@watermarktech.co.uk email address and we’ll do our best to help. Remember to let us know what your setup is to better enable us to respond quickly and comprehensively.
-
Q. How do I access Papercloud V2?
A. The same URL as ever… www.papercloudelite.co.uk
-
Q. Although the sign-in page looks different, are there any changes in functionality?
A. As mentioned above – the brief in this first upgrade is to build everything ‘as is’ with some minor tweaks and usability / visual improvements. Functionality upgrades and improvements are on our development roadmap for future releases.
-
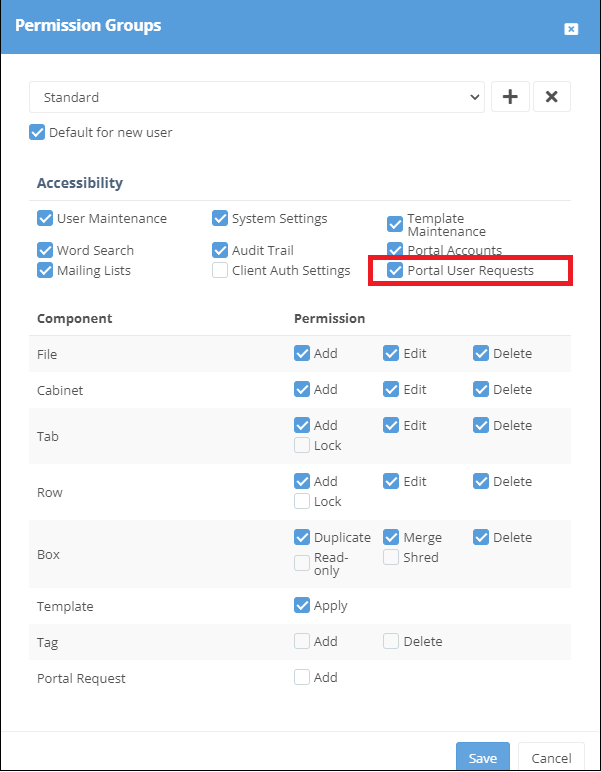
A request can now be sent to a Portal user to upload, review or sign a document held within the Portal environment. To facilitate this functionality "Enable Portal User Requests " needs to be enabled within "System Settings"

as a result the "Portal Request Manager" option then appears as a user option within the menu.

and within "Permission Groups " the option needs to be turned on for a "Standard User"
Within the file associated with a Portal user the required request can now be created against a box


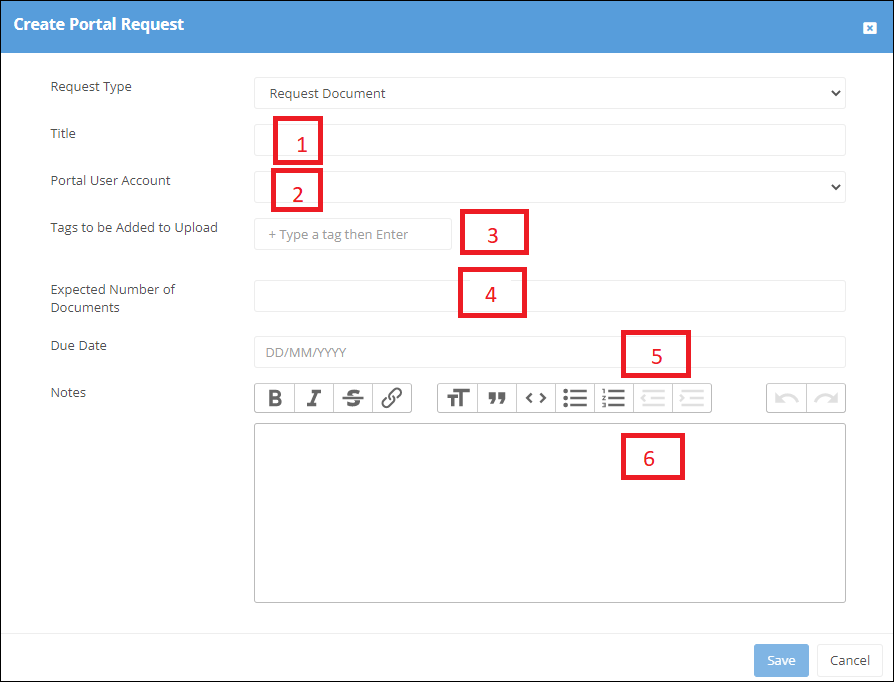
Request Document:
1: Basic detail in respect to request.
2: Email address of portal user associated with file
3: Tags can be added (For Tagging see https://staging.watermarktech.co.uk/papercloud-training/)
4: Indicates number of expected documents
5: Indicates expected return dates of documents
6: Additional notes for recipient
and saved in both locations

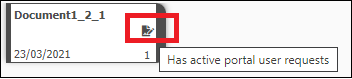
The box then indicating that it has "active portal user requests"
and an email sent to the Portal user
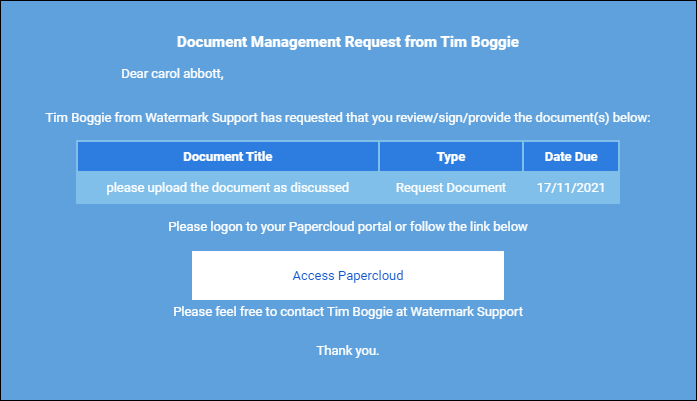
Within the file the Portal user will then see an "Action Requests" tab, with actions required plus any additional notes held within the + tab.
The Portal user can then take the appropriate action and upload the documents

Request Signature:
Follow the same process as above , using the "Request Signature" option.
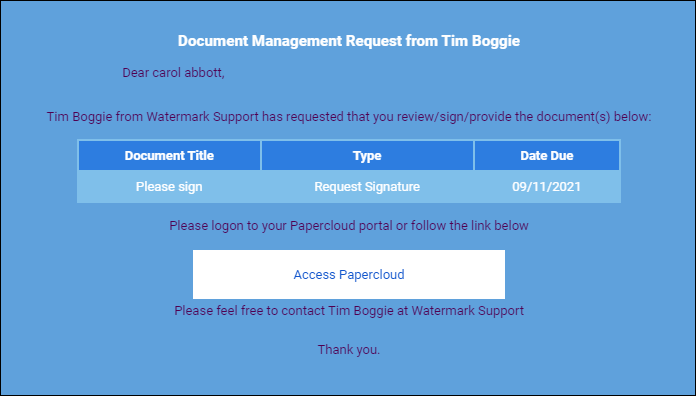

when "signing" the document the Portal user will need to complete the "Two Factor Code" which will be sent to their registered mobile number within Papercloud on request. Once the code has been added the process is completed

As a result the box will now contain both the original document plus a "Signed Summary".zip file
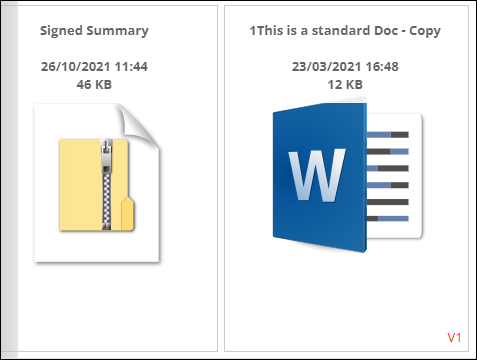
which details the completion certificate and cannot be moved, deleted or amended.

Request Review: Follow the same process as above using the "Request Review" option.
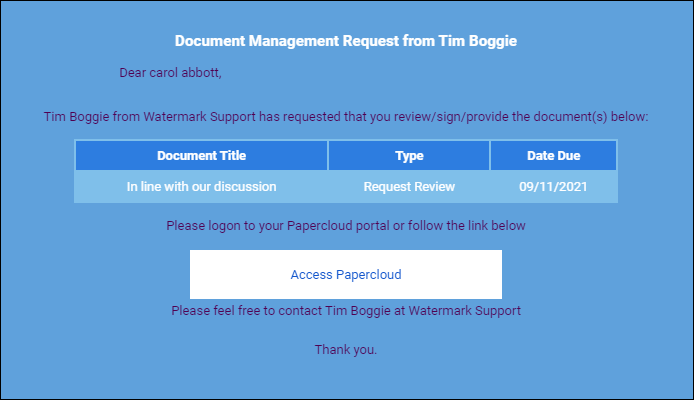

the Portal user can then Approve/Decline and add comment.
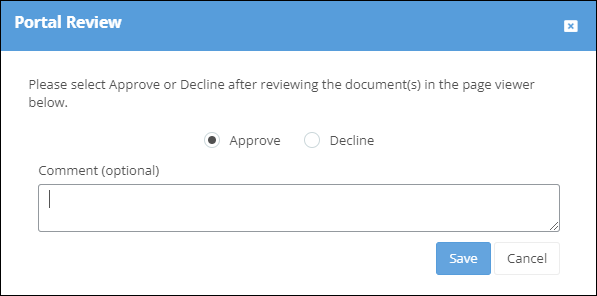
The "Portal Request Manager" enables a Papercloud User to review the status of all requests.

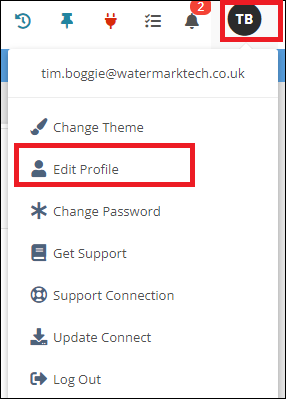
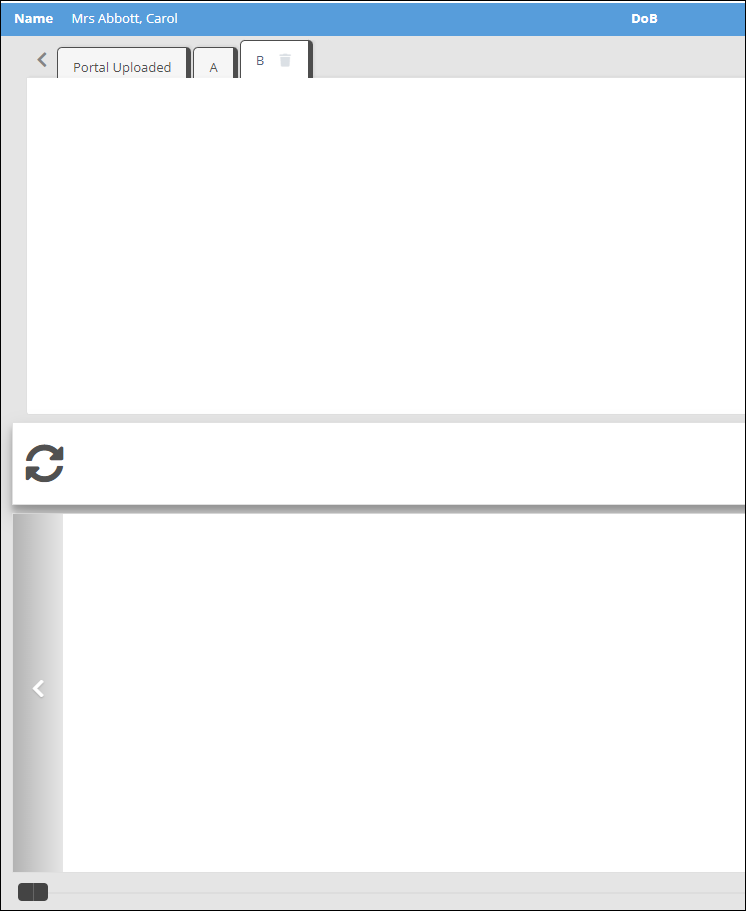
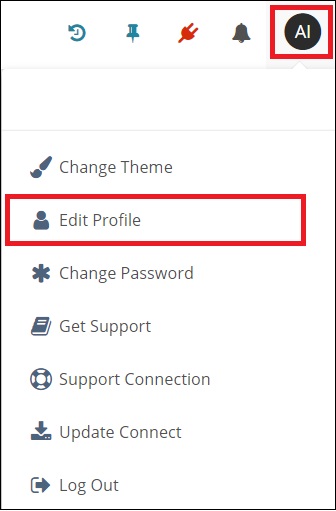
Can be fixed to always display the page viewer in files. The option is found in "Edit Profile" within the User menu

There is now a setting within "System Settings" requiring a new file to be allocated to a Cabinet

An Access Group can now be copied,
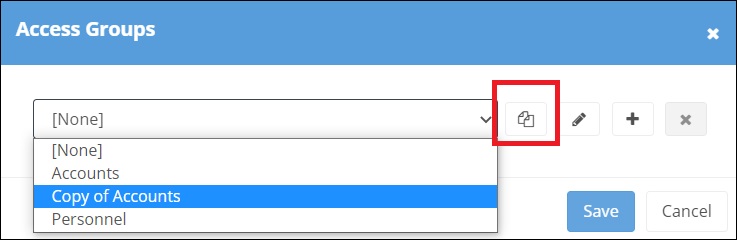
renamed and changed to meet a users requirements.
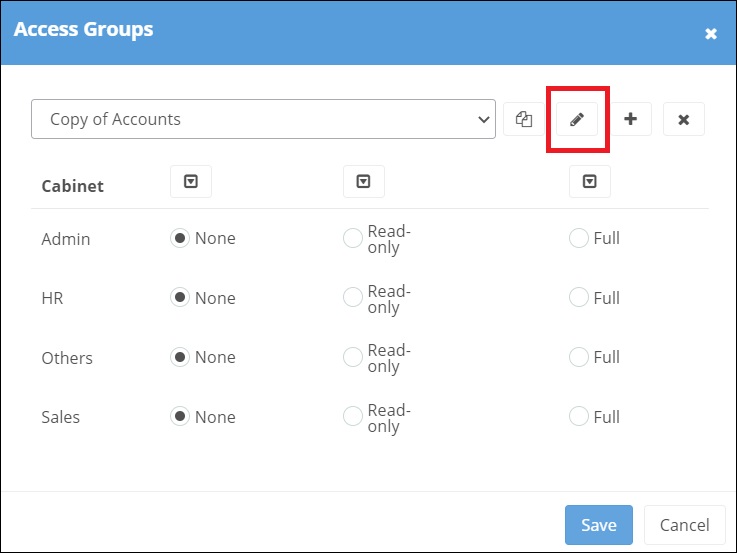
The additional arrows enabling the permission to be selected for all cabinets ,if required
The ability to link multiple files together and is actioned within "System Settings".

Corporate Links : This creates a relationship of one (identified as "Parent") to many (identified as "Child"). The "Parent" having a file type set as "Other"
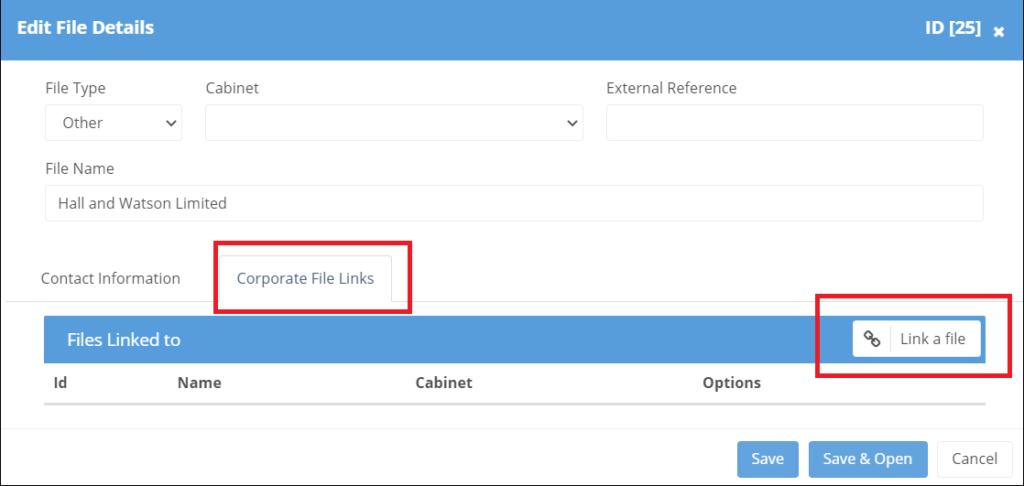
Once the links have been created
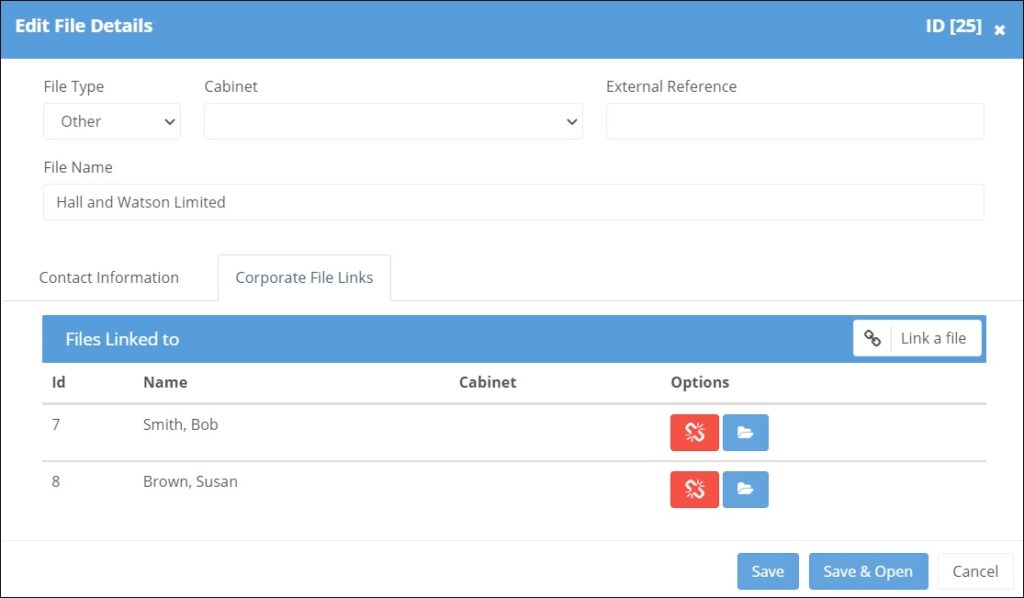
a symbol will then appear within all the related files. The "Parent" file listing all the "Child" files which can be jumped to . The "Child" file listing just showing the "Parent" file.

Child Links: This follows the same process ,with however all linked files shown in the list. This is applicable for those files set up as "Person".
When creating a new user in Papercloud the Two Factor Registration setting within "System Settings" enables a one-off SMS message to be sent to the user for additional log-in validation.
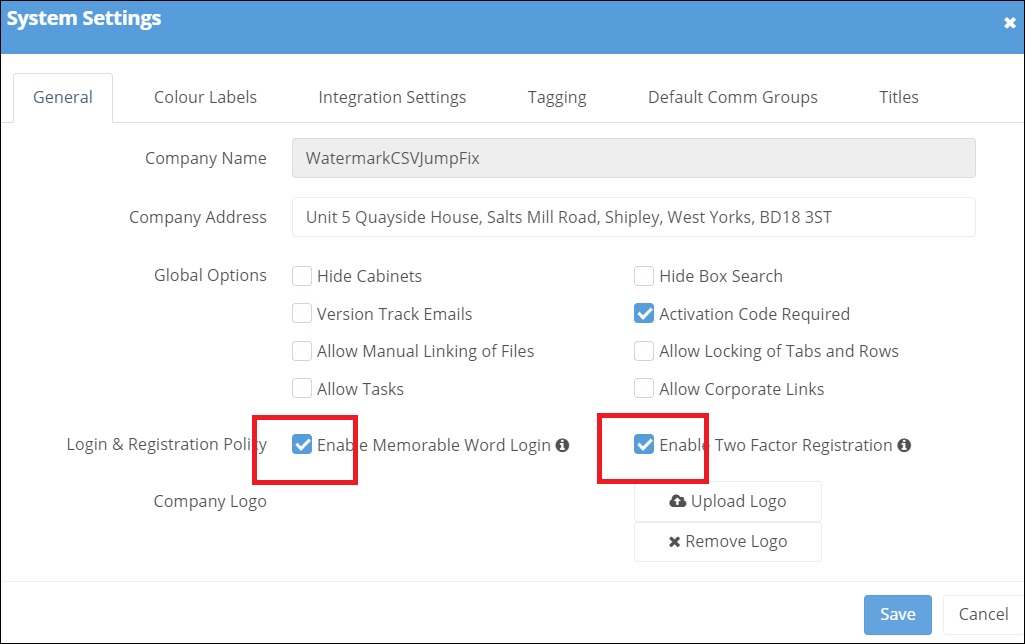
When creating a new user in Papercloud the Memorable Word login setting within "System Settings" requires the user to create their own memorable word from which random characters are then required on future login.
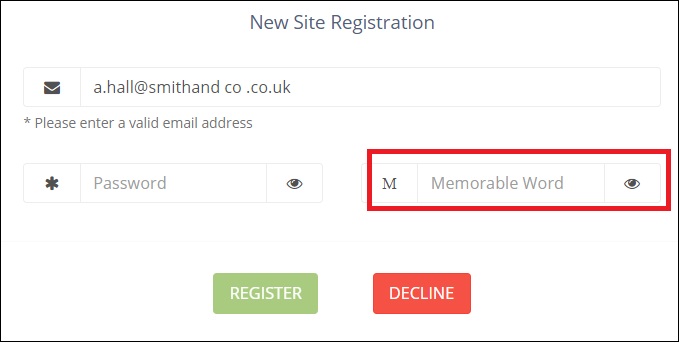
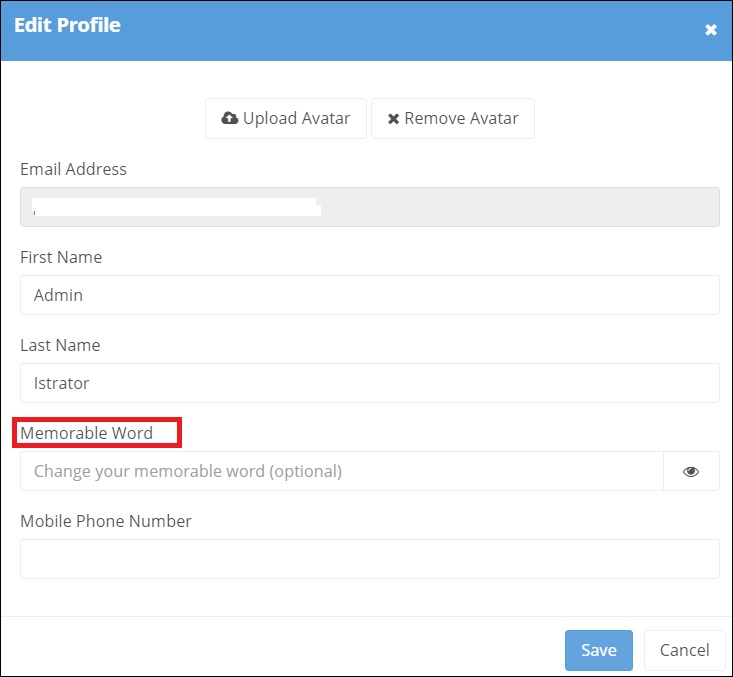
For an existing user the "Memorable Word" is set within "Edit Profile"
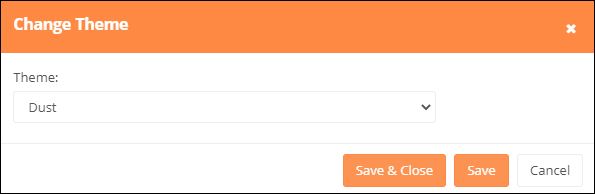
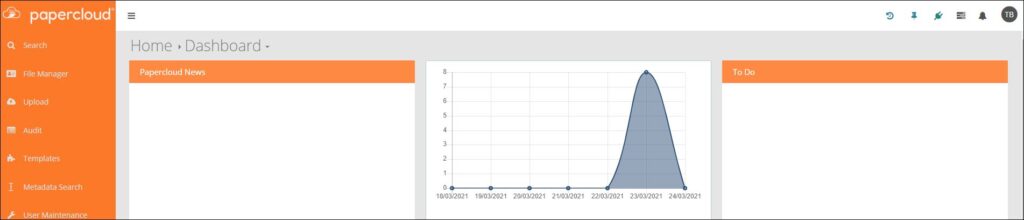
The background colour can be personalised by the user.

Choose
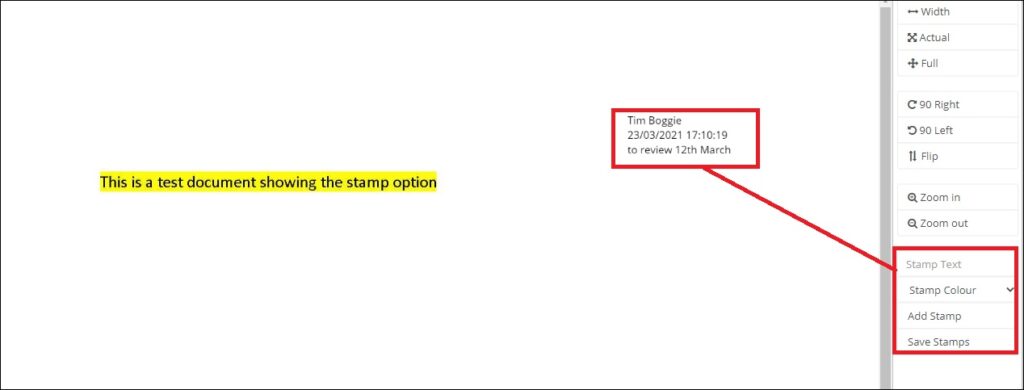
Additional narrative can be added to a JPEG image by using the stamp option. The user name, date and time are shown against the narrative and the version is updated.
Enables a box to be moved from one In -Tray to another.

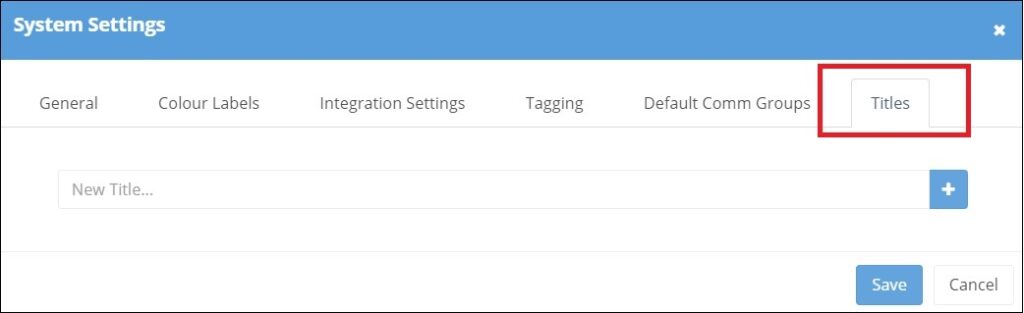
The list of available File name Titles can be now be amended via System Settings. Add the new Title, click on the "+" and Save.
Allows users to logon to Papercloud using their Azure Active Directory domain credentials, allowing a single set of credentials to be maintained by the user and offering the security benefits associated with a sites domain.
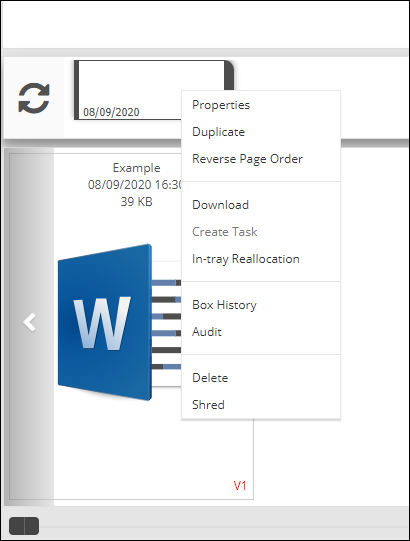
A box held on the In-tray of a user can be moved by that user to the In-tray of another user. Right click on box and select "In-tray Reallocation"
Then select the user from the drop down list
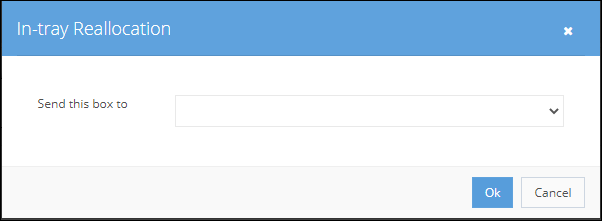
The box will be removed from the existing In-tray and re-appear on the reallocated one, with a notification also created for the new user.

Within Template Maintenance there is now a Document Store icon
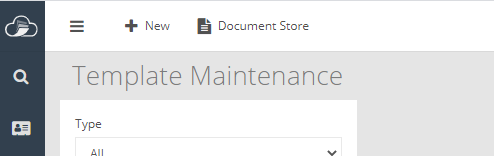
enabling the user to upload documents, held external to the software
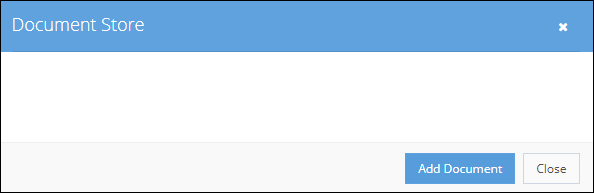
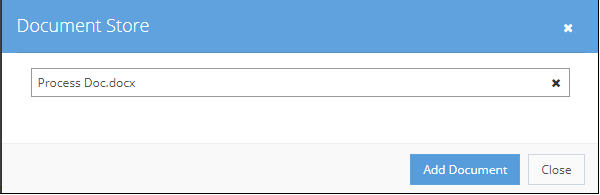
and then include any combination of saved documents within a Template box.
Within Template Maintenance double click on a template box.Select the required documents from the drop-down list and save.
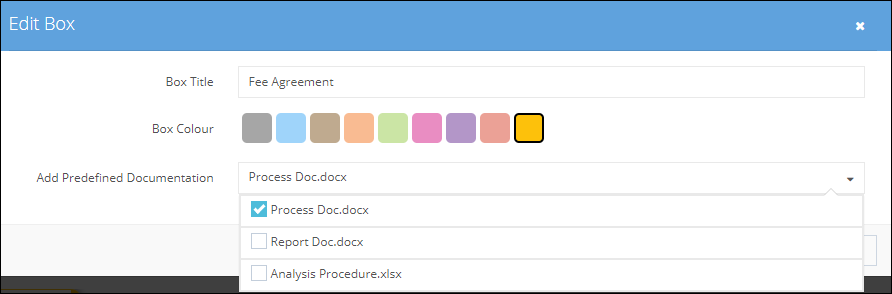
The icon appears indicating that documents are now attached
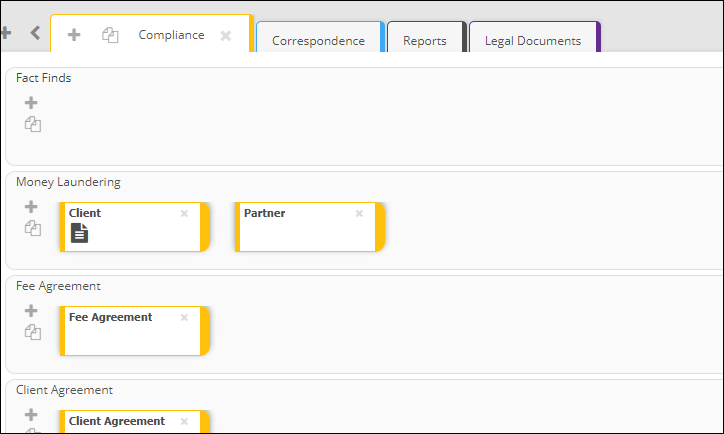
and when applied to a file

All externally held images can be dragged directly into the software either on to a row, in to a box or onto the in-tray of the user.
The editing of an email address is actioned through User Maintenance and as a result disables access if using the old email address.

A new user invitation is generated and sent to the user requiring them to re-register.
The editing of a mobile number is also actioned through User Maintenance.
Within the permissions available for a user there is now a Mailing List option
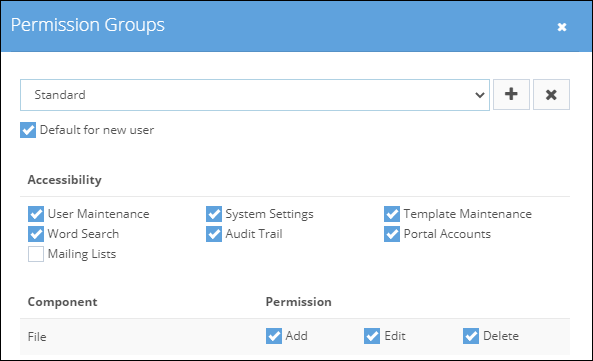
once this has been made available to the user the option appears within File Manager

The exported list will only include those files the user has access to and can be restricted to files within a specific cabinet
Papercloud Elite users can get notifications when portal clients upload documents. When a user is set to receive notifications, either directly or via a Communications Group they are called 'Subscribers'.
Users can convert these notifications into 'TO DO' list items on the dashboard.
A notification that a portal client has uploaded a file can be added to a single user or a 'Communication Group' of users.
To create a communication group, first enter the 'User Maintenance' screens, using the spanner icon.

Then click on the 'Communication Group' link.

In the Communication Group edit box you can add groups by clicking the '+' button.

Or edit existing groups by choosing them from the drop down.
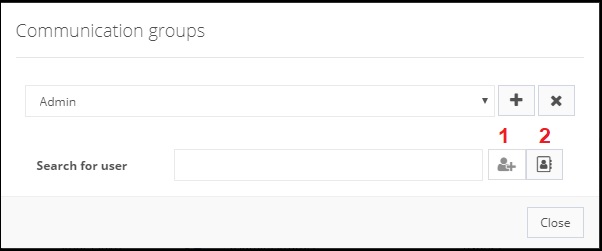
You can start typing user names in the 'Search' box and use the add button (1) or you can click the 'list' icon (2) and tick each user to add to the group. You can remove members using the 'X' against the member of the group.
You can add a user or a Communication Group via the 'Portal' link in the open file or in the 'Portal' section of 'User Maintenance'.
Open a file and click the 'Portal' link at the top of the page.
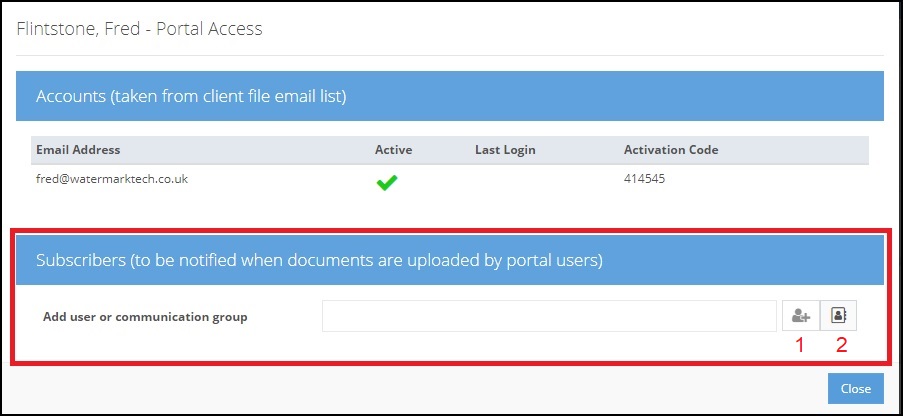
In the 'Add user or communication group' box type a name and a list will appear, highlight the correct user/communication group and click the 'Add' (1) button. Alternatively the 'List' (2) button will allow you to tick the users/communication groups you want.
The display will then show the users/Communication Groups associated with that portal client. Clicking the 'X' in the top right will remove that user/communication group.

To add a user/Communication Group via 'User Maintenance', click the user maintenance icon
Then choose the 'Portal' drop down at the top.

Next click the 'edit' button for the portal user you want to change.
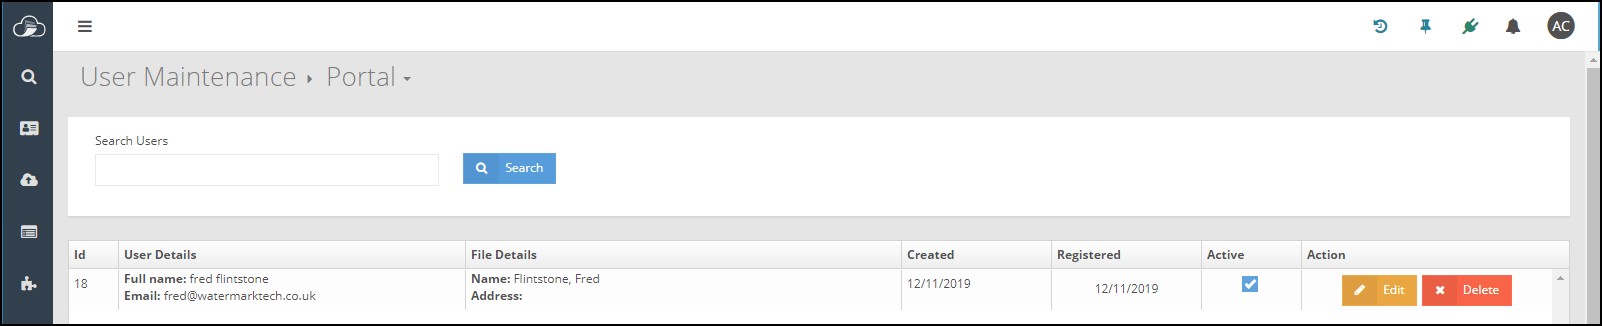
and the 'Add user or communication' option is at the bottom of the screen.

Users or a Communications Group can be added or removed in the same way as detailed above.
When a client with portal access uploads a document, the 'Subscribers' to that client will see a new notification as a number overlaying their notification bell.

Clicking on the 'Bell' will give more information and also a list of unprocessed notifications.
Clicking the 'X' acknowledges the user has seen the notification and removes it from the list. Clicking the 'Pin' turns the notification into a 'To Do' item on the users dashboard.


Clicking on the 'To Do' item will take the user directly to the uploaded document in the portal users file and tick the 'To Do' item as complete.

The ticks can also be manually added/removed. If the ''To Do' item is no longer required it can be completely removed using the 'trash' icon.
In Papercloud Elite, it is possible to create a task and allocate it to a specific User or Communication Group for comment and action.
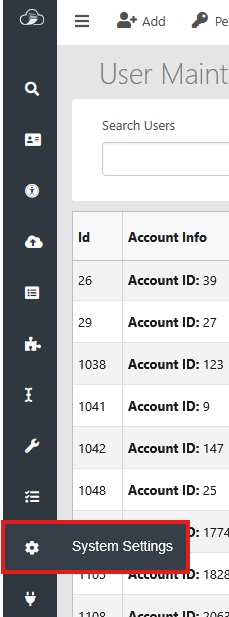
By default, Task Maintenance is not enabled. To enable, click on the 'System Settings' icon.
Note: Appropriate system permissions are required.
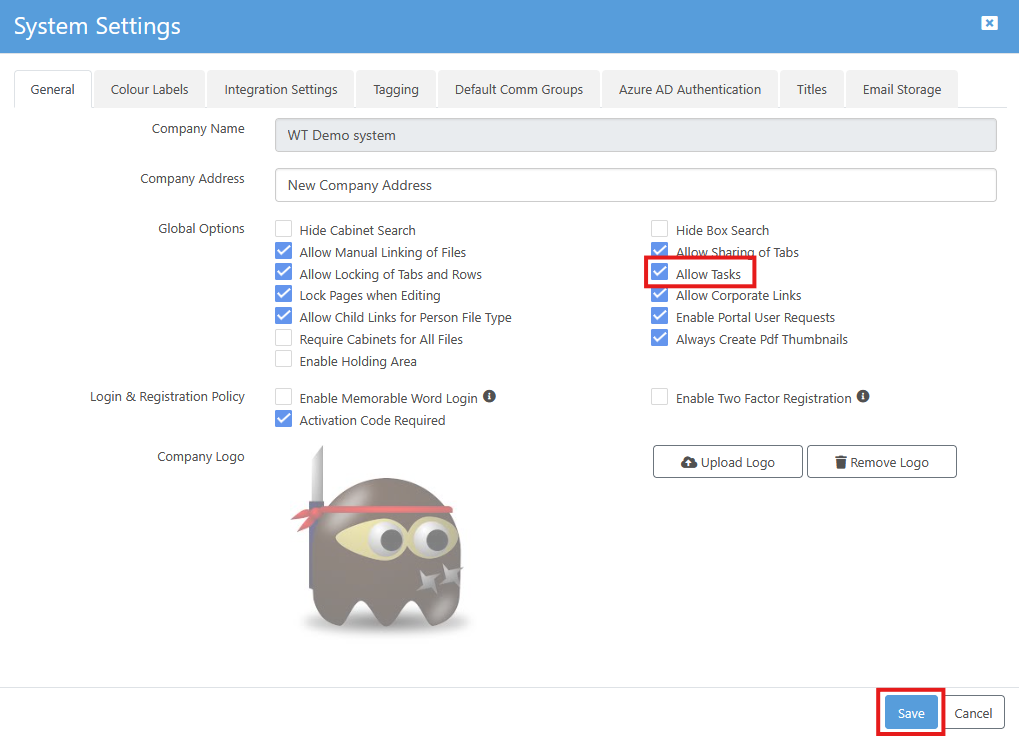
Then, on the 'General' tab, select 'Allow Tasks' and click 'Save'.
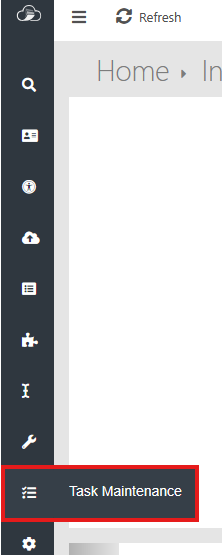
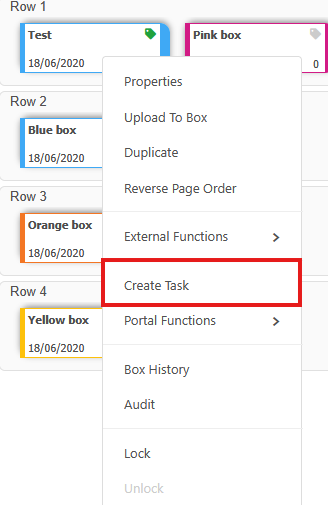
A new Task can be created either from the menu ribbon down the left or at box or document level.
From the menu ribbon, select 'Task Maintenance':
Or by right clicking on box or image:
The steps required in order to complete the task can be added, amended, deleted and ticked to confirm completion. A due date is required and the task can be marked as important.
The Status changes on completion of a step.

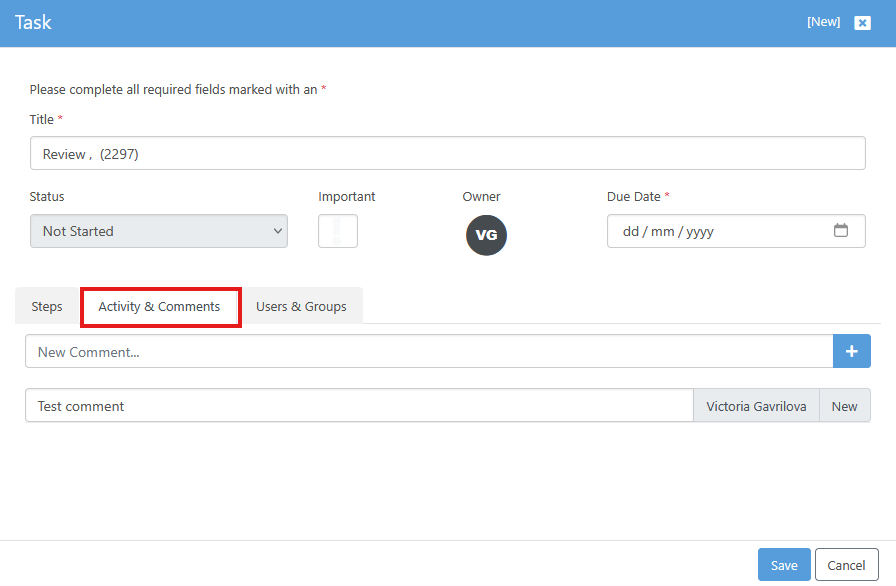
User comments can be added at any time. Activity is added automatically on completion of a task.
These can be individuals or User groups.
For Groups see "Using Permission Groups & Access Groups" KBP006.

This enables the user to filter the task list:


1. The Notification tab alerts users to new or outstanding tasks, as well as any updates to those tasks.

2. The Task list sidebar displaying all details, steps, and a link to the related work items.